💬 Un expert est disponible maintenant

Understand · Choose · Use

A guide to alarm systems
for homes and businesses.

From the Qolsys panel to the Alarm.com app: learn how to protect your property and use your equipment, step by step.

ResidentialHouse and apartment
CommercialBusiness and warehouse
24/7Monitoring*

Your property, your protection

Security that fits
your everyday life.

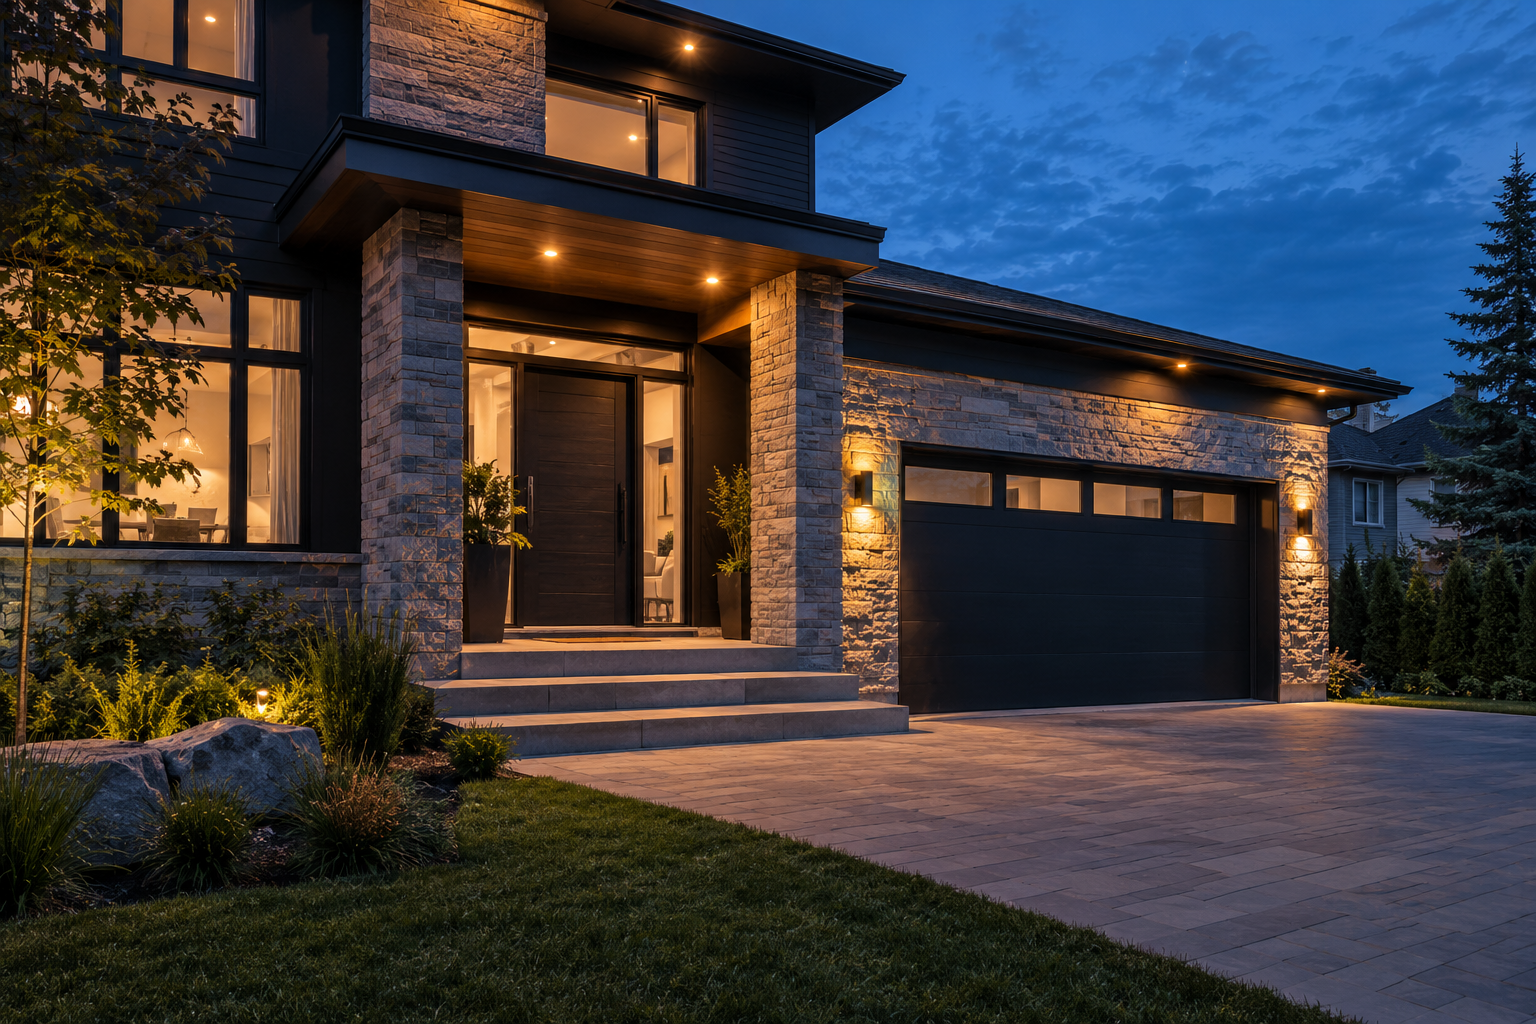
Illustration of a contemporary house entrance and garage at dusk

Residential security system

Protect your home's entrances, receive alerts and stay in control of connected equipment.

Explore the service
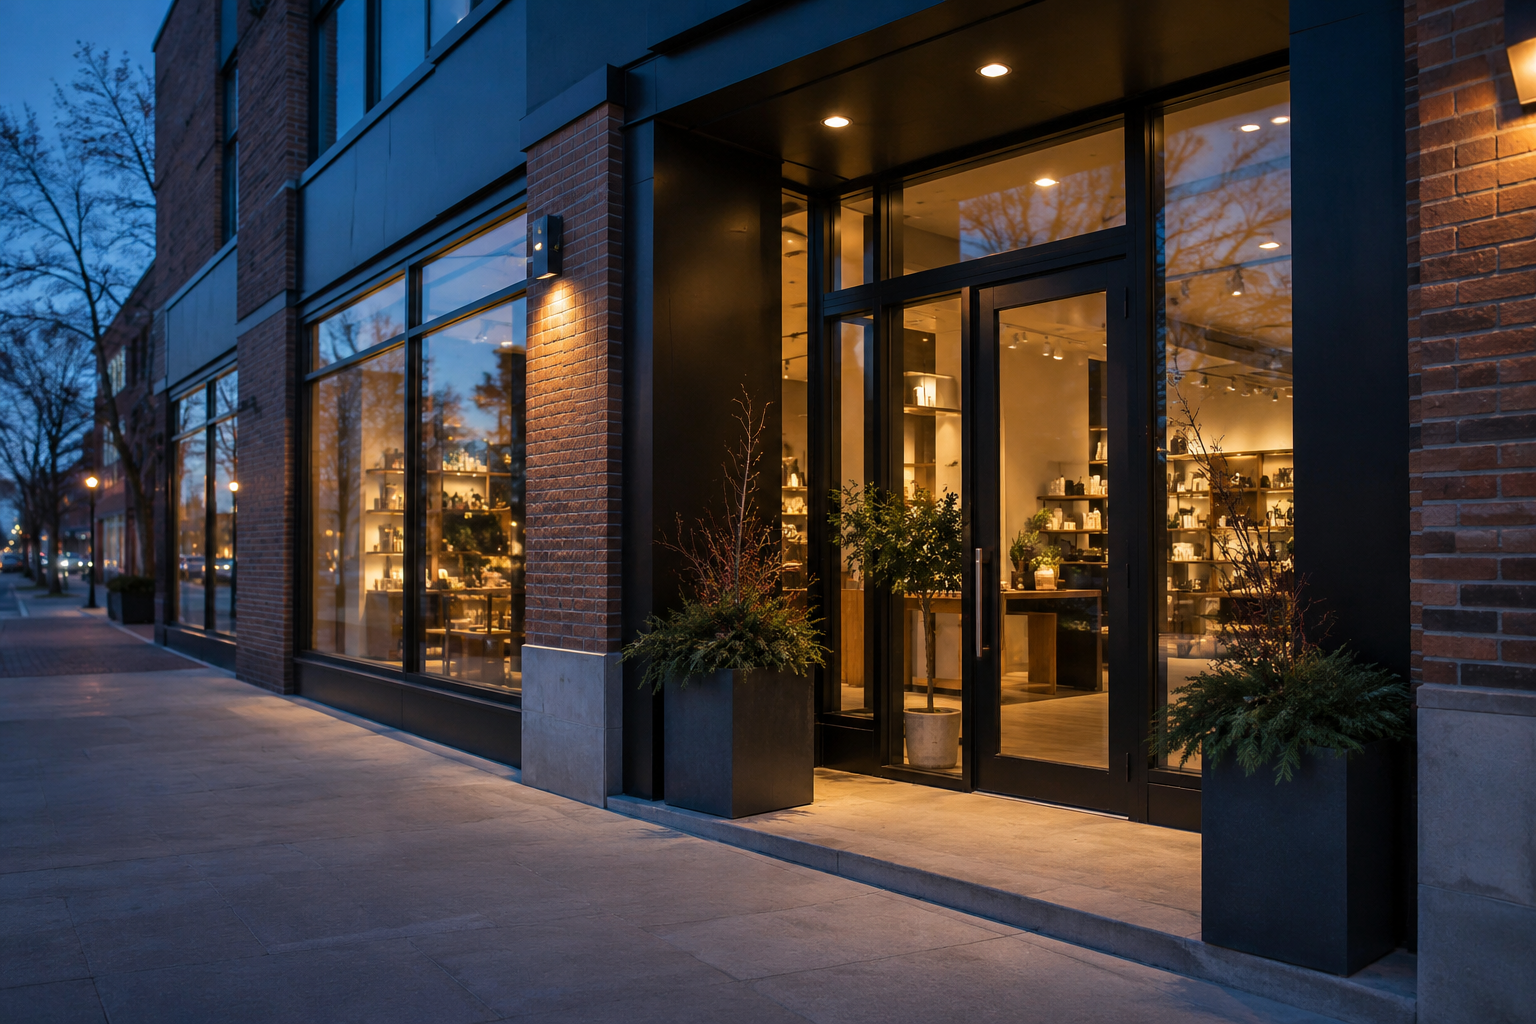
Illustration of a glass-fronted business entrance at dusk

Commercial security system

Manage access, monitor your premises and adapt protection to your staff and business hours.

Explore the service

Your practical guide

Get to know your security system.

Arm your IQ Panel, use Alarm.com, manage your cameras or access: find the steps you need every day. Choose a topic below to jump straight to its instructions.

01 / Your Qolsys panel

IQ Panel: your user guide.

Learn the controls for arming, disarming, managing users and understanding alerts.
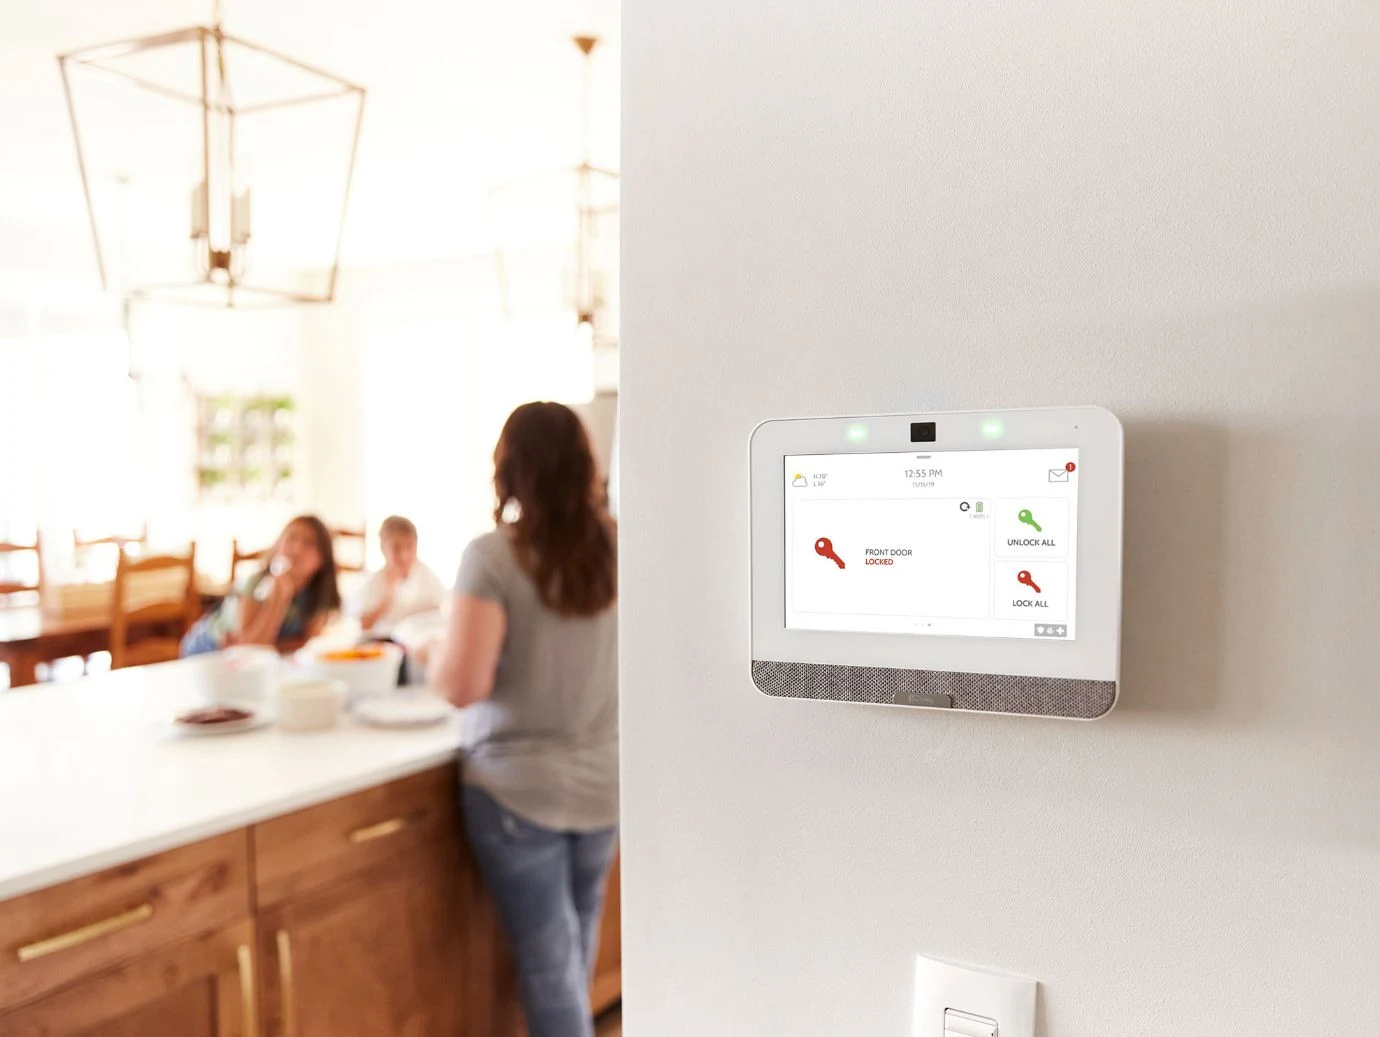
Qolsys IQ Panel 4 touchscreen
Qolsys IQ Panel 4 · Manufacturer image.
Menus vary with software and programming. Emergency controls depend on your activated service.

What is the Qolsys IQ Panel?

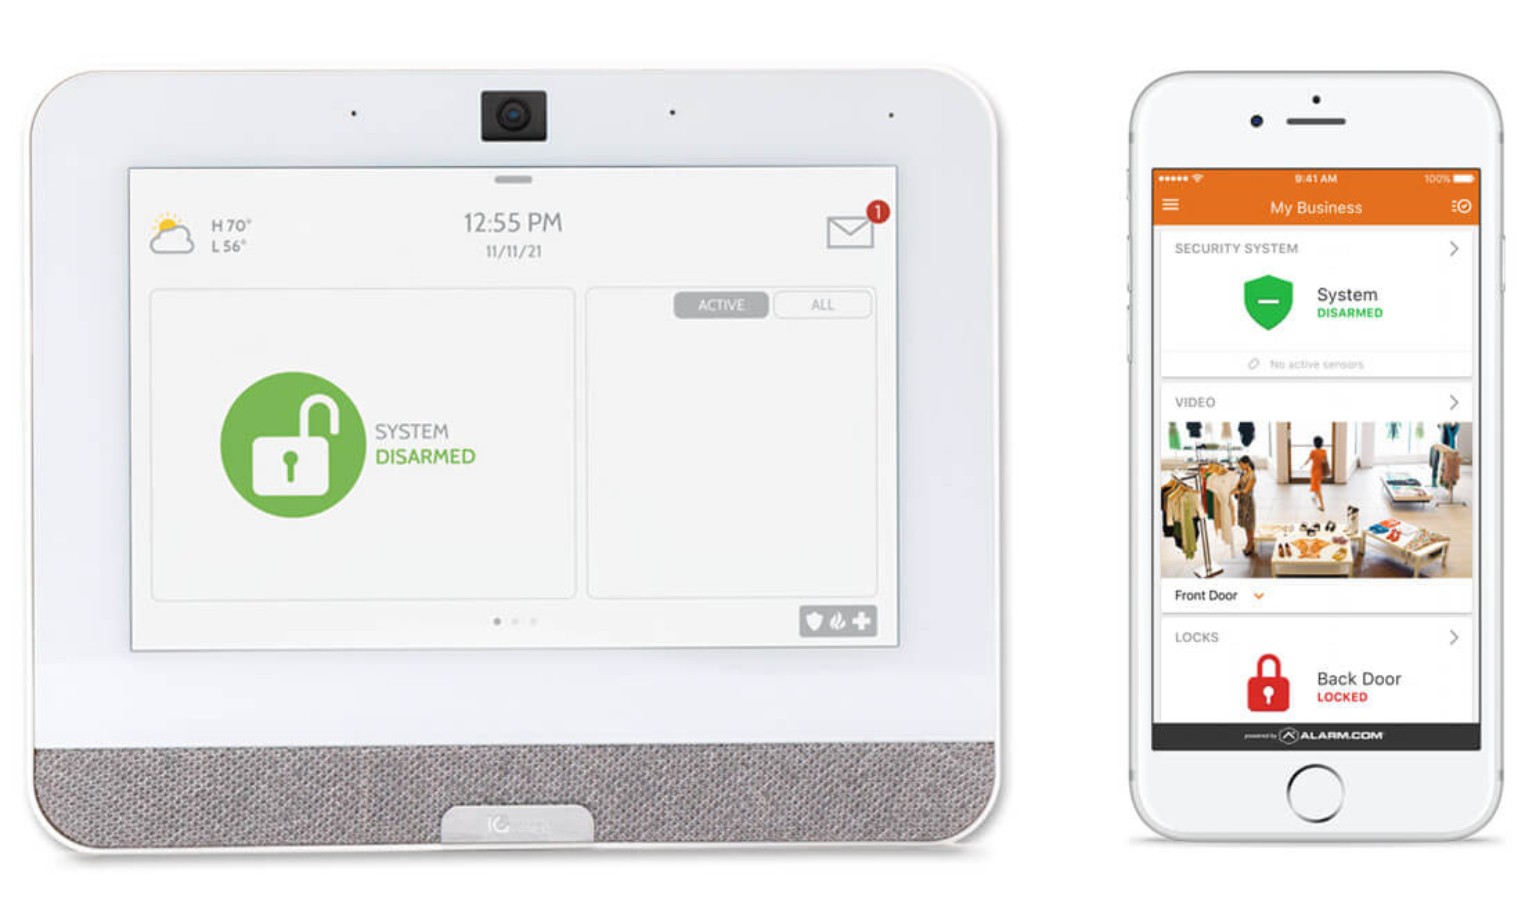
Qolsys IQ Panel and Alarm.com app displaying security status and connected equipment
At the panel or on your phone: two ways to view your security system. Available devices and controls depend on your installation and service.

The IQ Panel is the touchscreen control centre for your security system. It displays sensors, the armed or disarmed status and system messages. Depending on your installation, it also provides access to locks, scenes and other compatible devices.

These instructions cover IQ Panel 4. Menu names and screens vary with software, language and configuration. Other Qolsys models may look different.
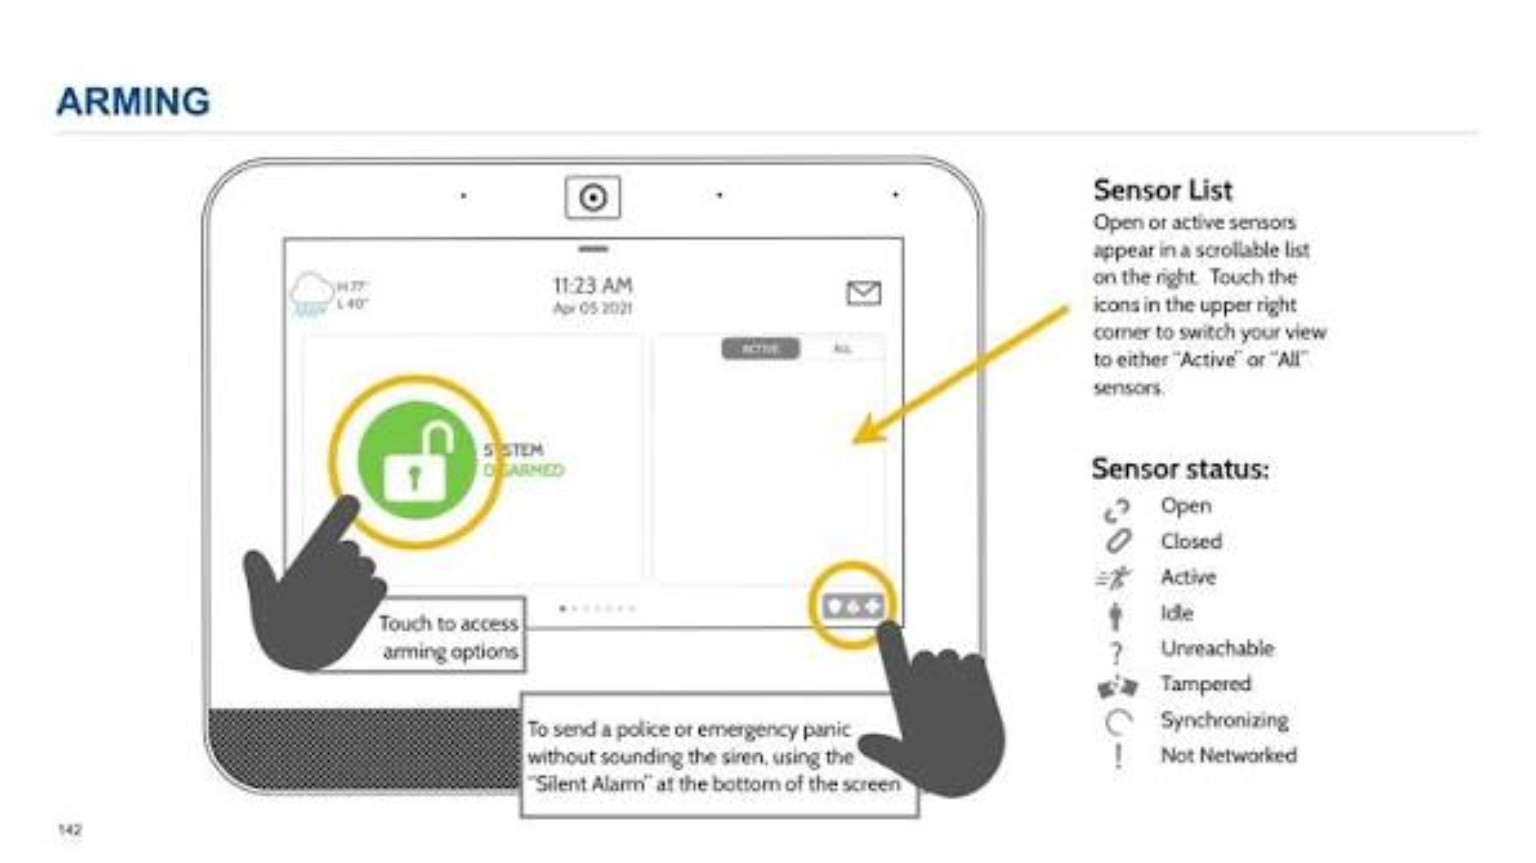
Find your way around the screen

Find the main IQ Panel controls.
Find the main IQ Panel controls. Touch the central lock for arming options. Sensor status and emergency controls are shown on the right. Screens vary by model and software.Tap the image to enlarge.

The security screen shows the system status in the centre and sensors on the side. The active sensor view helps identify an open door or window. Swipe down from the top to open settings; advanced settings require an authorized code.

Check zone names: “Back door” should identify the correct door. Ask your installer to correct unclear names during training.
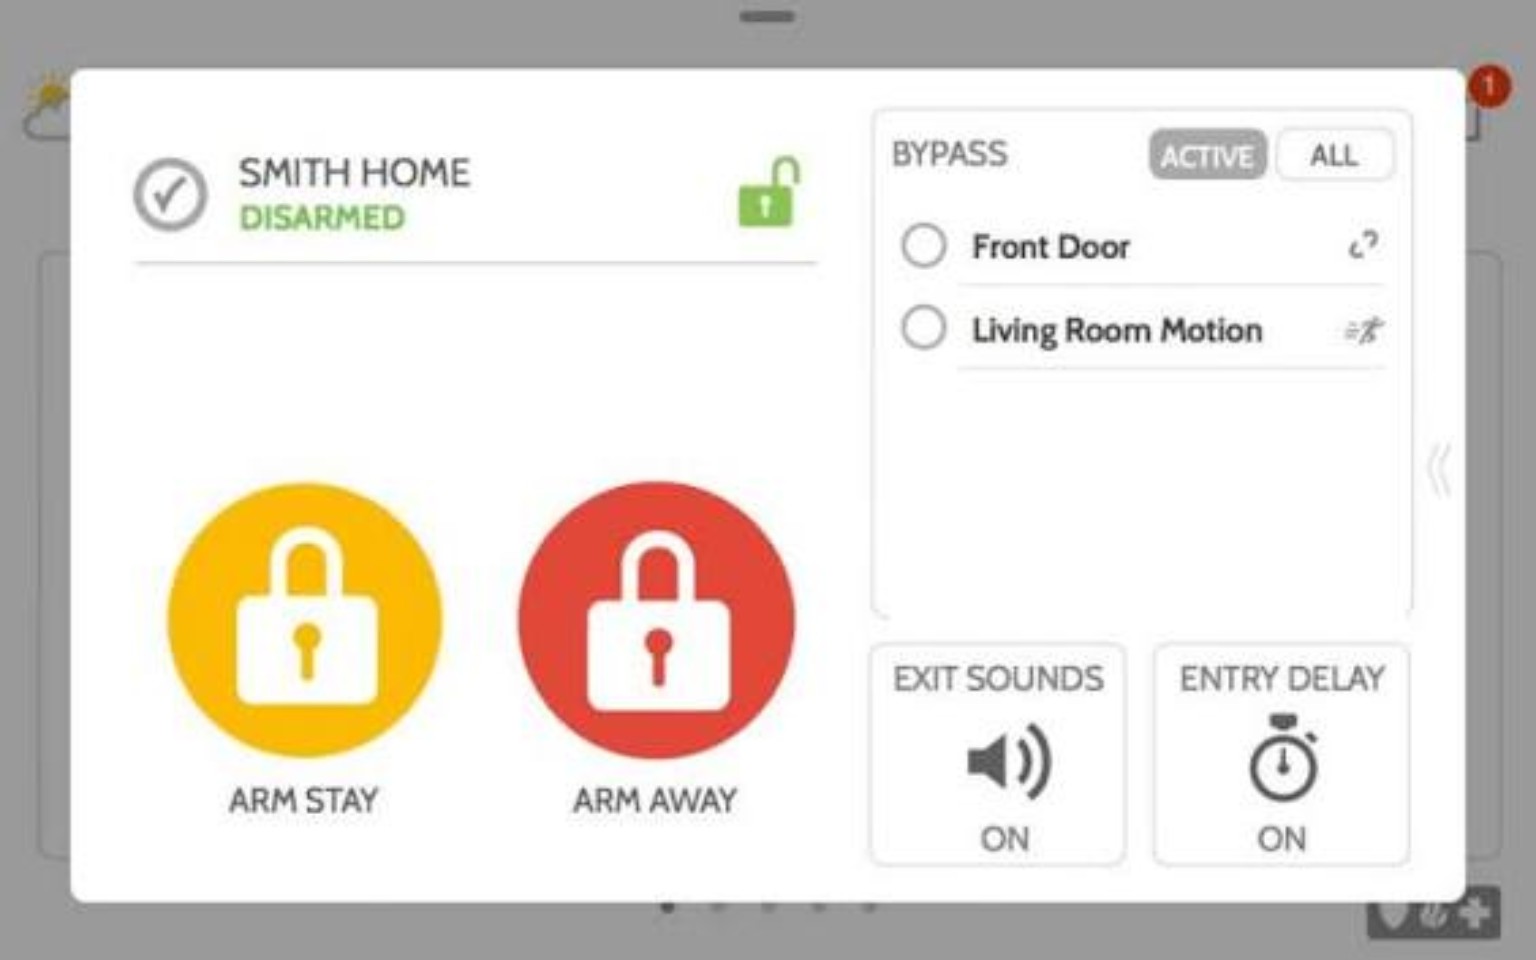
Arm Away when everyone is leaving

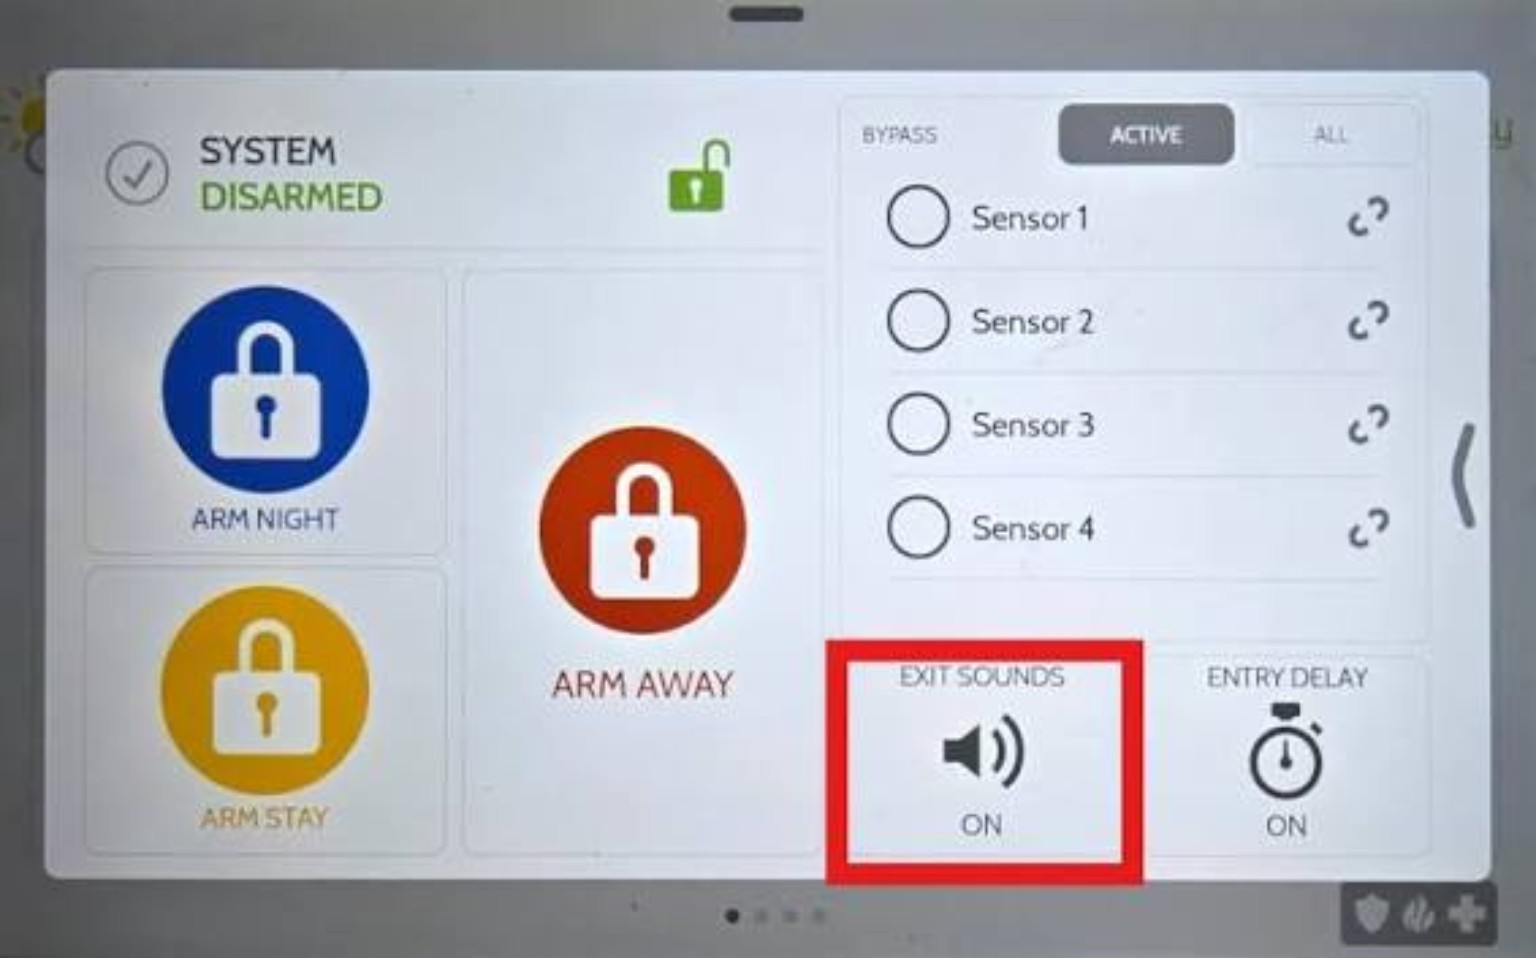
Choose Stay or Away.
Choose Stay or Away. Yellow: Arm Stay. Red: Arm Away. The right side shows bypass, exit sounds and entry delay options.Tap the image to enlarge.
  1. Close protected doors and windows. Check active zones and trouble messages.
  2. Touch the central system status to display arming options.
  3. Select Arm Away. This activates the contacts and motion sensors programmed for intrusion protection.
  4. Leave through the designated exit during the displayed exit delay.
  5. Confirm the armed status. Resolve any fault before assuming protection is complete.

If someone remains inside, check which areas they need to use before choosing this mode.
Arm Stay while you remain at home

Additional arming options.
Additional arming options. Some software configurations also show Arm Night. Confirm which zones and delays this mode uses before enabling it; it is not available on every system.Tap the image to enlarge.
  1. Close the entrances you want to protect.
  2. Open arming options and select Arm Stay.
  3. Check the confirmation and any bypassed zones.

This generally protects the perimeter while allowing normal indoor movement. Confirm your programming: some zones may remain active at all times.

The no entry delay option changes the response when an entrance opens. Do not enable it if someone needs to enter using the normal delay.
Disarm when you arrive

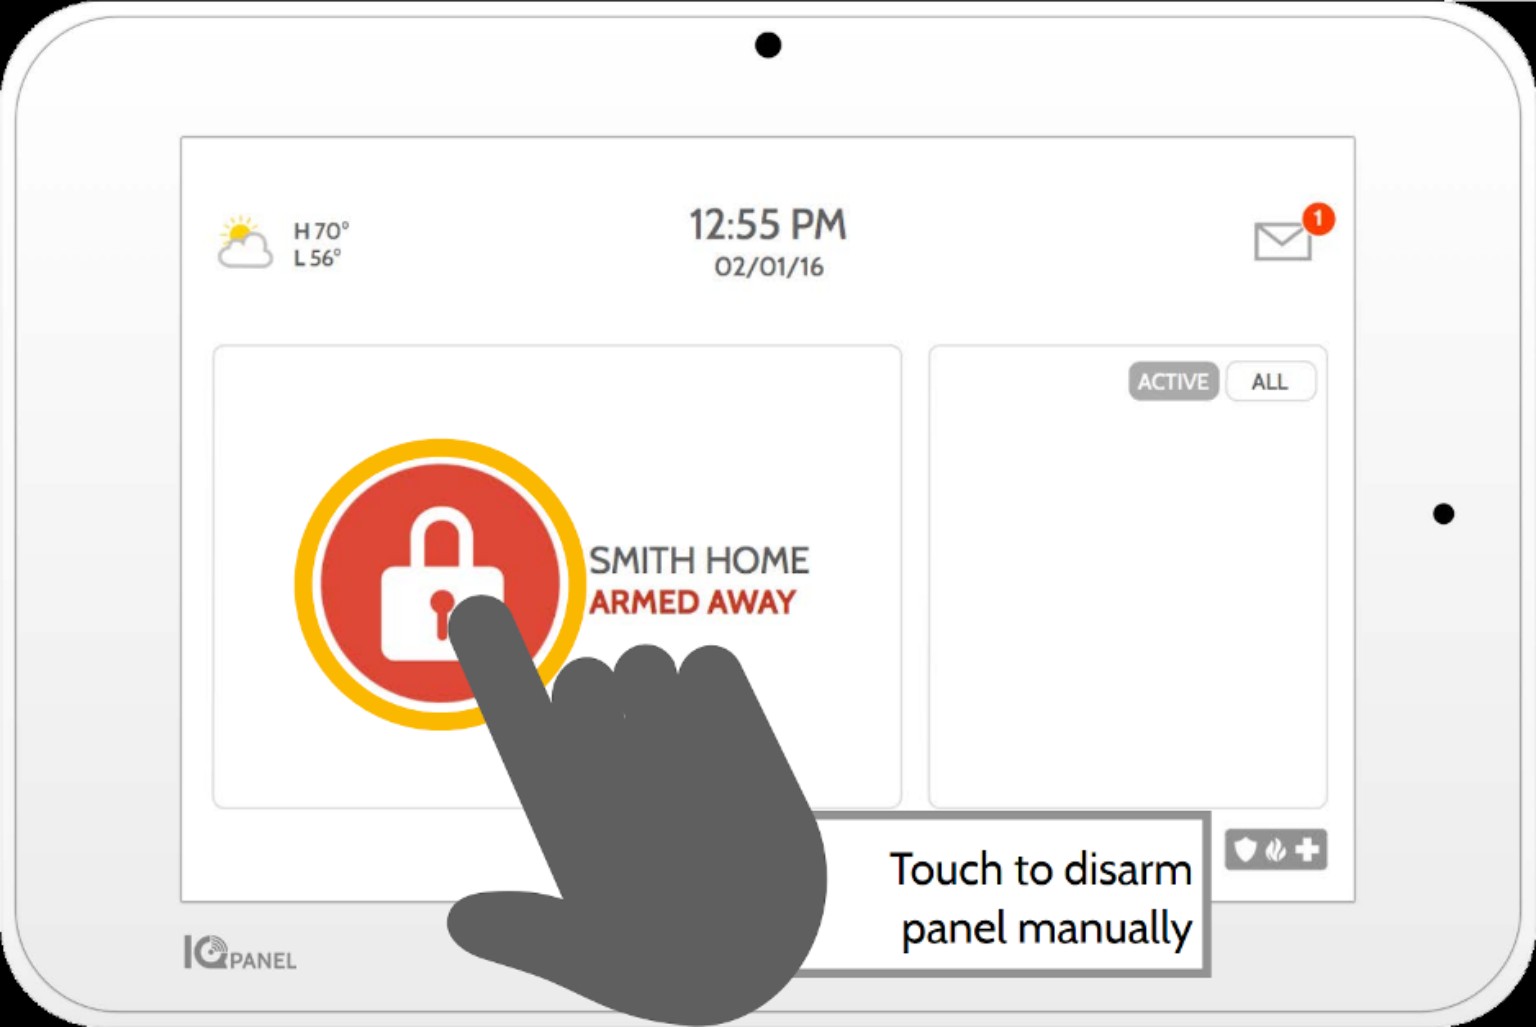
Touch the armed status to disarm.
Touch the armed status to disarm. Touch the red lock, then enter your authorized code. This supplied illustration shows an earlier IQ Panel design; your screen may differ.Tap the image to enlarge.
  1. Enter through the door configured with an entry delay.
  2. Touch the central panel control and enter your personal code before the delay expires.
  3. Wait for Disarmed before moving into other protected areas.

Keep a code you can use without your phone. Your Alarm.com password, panel code and monitoring station verbal password are separate credentials.

Create or edit a user on the panel

With an authorized master code, open the top menu, then Settings → Advanced Settings → User Management. Add a user or edit a profile. Enter the name, code, role and, where available, expiry, then save.

Give each person their own code. Reserve master privileges for system managers. Check synchronization with Alarm.com and lock access; do not assume a change has reached every device without checking.

Emergency controls: police, fire and medical assistance

On IQ Panel 4, the bottom-right emergency icon opens the available Police, Fire and Emergency panic options, depending on configuration. Three separate buttons are not necessarily always visible.

In a real emergency, choose the request configured for your installation. Signals are handled according to your monitoring service and its procedures. These controls do not guarantee a direct call to emergency services or a response time.

Do not try them for practice. Arrange a demonstration with your provider. In a fire or CO emergency, evacuate and call 911 from a safe location. Do not rely solely on the panel for an immediate emergency.

A compatible portable or fixed panic button can supplement the system. Confirm its activation method, range, maintenance and signal handling.

What happens when the monitoring station receives an alarm?

The response depends on the signal and your account instructions. The station may verify the event, attempt communication and call your contacts. Some alarms require different handling; do not assume every contact is called before action is taken.

Prepare two or three reachable contacts, where this meets service requirements: names, numbers, priority order and roles. Identify who can attend and who knows the property. Update the list when a number, employee or responsible person changes.

For an accidental activation, disarm if safe and follow the monitoring station's procedure. Be ready to give your verbal password. Disarming does not guarantee cancellation of a response already underway.

Understand a beep or trouble message

Open the message centre, read the message and identify the affected sensor. A low battery, communication failure and open sensor require different actions. Clearing a message does not fix its cause.

A bypassed zone will not trigger an intrusion alarm while bypassed. Check the excluded protection and have persistent faults corrected instead of leaving a zone disabled.

02 / Assessment and installation

Where should equipment be installed?

Start with actual entrances and risks. Have the final plan confirmed on site for your building and each device's instructions.

Review doors and windows

Draw a plan of every level and mark all exterior doors: front, back, patio, basement and service entrances. Include the door between the house and attached garage. Identify windows accessible from the ground, deck or adjoining roof.

For each entrance, note its use and proposed detector. A contact monitors the fitted opening; it does not automatically detect broken glass. A glass-break detector serves a different purpose and must suit the glazing and room.

Place motion sensors on the main floor and in the basement

Look for routes someone would use after entering: a hallway, corridor or connecting room. Main-floor and basement sensors may be appropriate, but the number depends on coverage, partitions and use.

The installer checks the specified angle, height and range. One sensor does not necessarily cover a whole floor. Furniture, heat sources and pets affect placement and selection. Have coverage tested after installation.

Smoke detection: cover every level

Smoke rises, but a top-floor alarm alone is not enough. Québec guidance covers every floor, including the basement, hallways near bedrooms and rooms used for sleeping. Follow manufacturer instructions and local requirements for placement.

Avoid obstacles and air currents that could delay detection. A monitored detector does not automatically replace municipally required alarms. Commercial fire protection needs a building-specific assessment.

Follow the manufacturer's testing procedure. Arrange monitored tests with your provider first. For smoke or a real fire alarm, leave and call 911 from a safe location.

Carbon monoxide: more than gas appliances

CO can come from faulty combustion involving gas, oil, wood or other fuels. An attached garage also needs consideration. A CO detector does not detect combustible gas leaks unless designed for that function.

Québec guidance includes floors and basements, areas near bedrooms and relevant locations near an attached garage, without placing the alarm inside the garage. Follow the manual and municipal requirements for precise placement.

If a CO alarm sounds, get everyone outside and call 911. Do not wait for the monitoring station before evacuating or search for the source yourself.

Water sensors: water heaters and leak-prone appliances

Place probes where leaking water could collect: on the floor by the water heater, under a sink, near a washer or another suitable water source. The sensor does not go inside the tank; it detects water contacting its sensing area.

Test according to instructions. A water alert does not necessarily shut off the supply. Automatic shutoff requires a compatible valve installed and configured for that action.
Where should the panel go, and how is installation prepared?

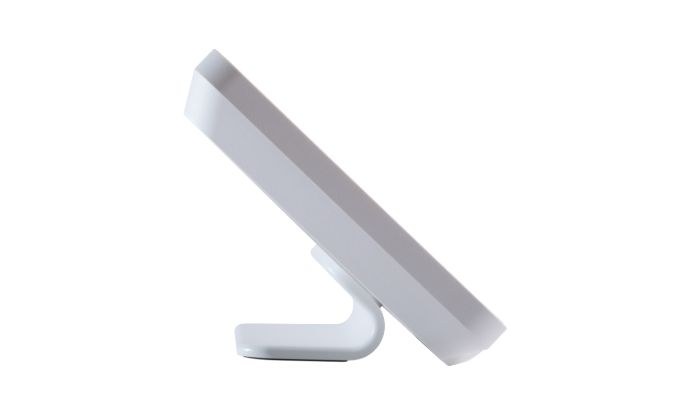
Official side view of IQ Panel 4 on its tabletop stand
Your IQ Panel, within reach. The panel can be wall-mounted or fitted to a suitable tabletop stand. Confirm the location and accessories with your installer.
  1. Choose an accessible indoor location near the usual entry route, without unnecessarily exposing it to view from outside.
  2. Have the technician check power, sensor radio reception and panel communications. Choose a height suited to users.
  3. Plan wiring and mounting according to the manual. Use the specified power supply and suitable outlet.
  4. The installer mounts the panel, pairs and names zones, and configures delays and arming modes.
  5. They set up communications and monitoring, then perform agreed tests with the station.
  6. Train each user on arming, disarming, emergencies, contacts and the app.

Do not copy random installer settings: they can change zone behaviour and transmission. Permanent electrical connections and fire protection work require the appropriate qualified professionals.

Wired, wireless or hybrid: check before replacing

Wired zones use cables; wireless zones use compatible radio communication. A hybrid system can combine them. “Wireless” does not mean every sensor uses home Wi-Fi.

Have existing wiring, model numbers and compatibility checked before replacing all detectors. Ask what can stay, what changes and which tests are included.

Your checklist before requesting a quote

List exterior entrances, building levels, pets, video needs, authorized users and water or combustion risks. For a business, include hours, deliveries and areas occupied after closing.

A quote should distinguish equipment, installation, subscription, video retention and service conditions. No universal sensor count or single plan suits every property.

Alarm.com

Your connected system.
One app.

Alarm, video, locks, garage and lighting: find compatible devices in one place.
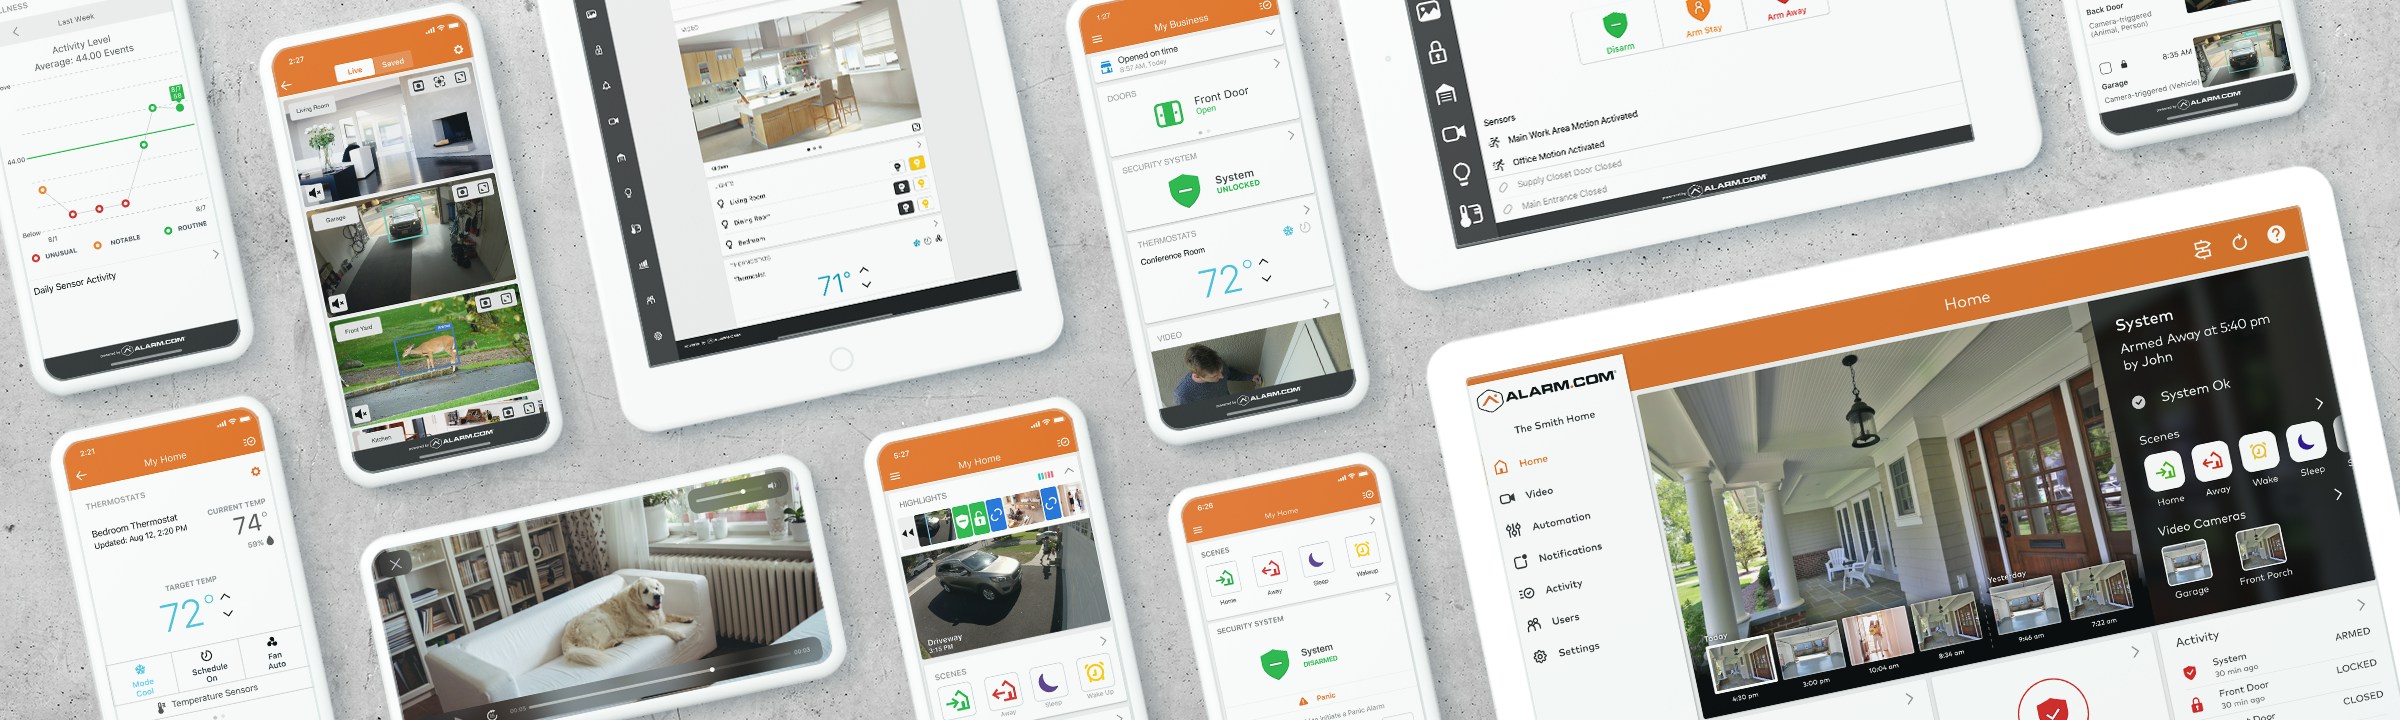
Official overview of the Alarm.com app and controls
Official Alarm.com image. Features depend on your equipment and service.

03 / The app

Using Alarm.com, step by step.

Menu names may vary. Available controls depend on your plan, equipment and account permissions.
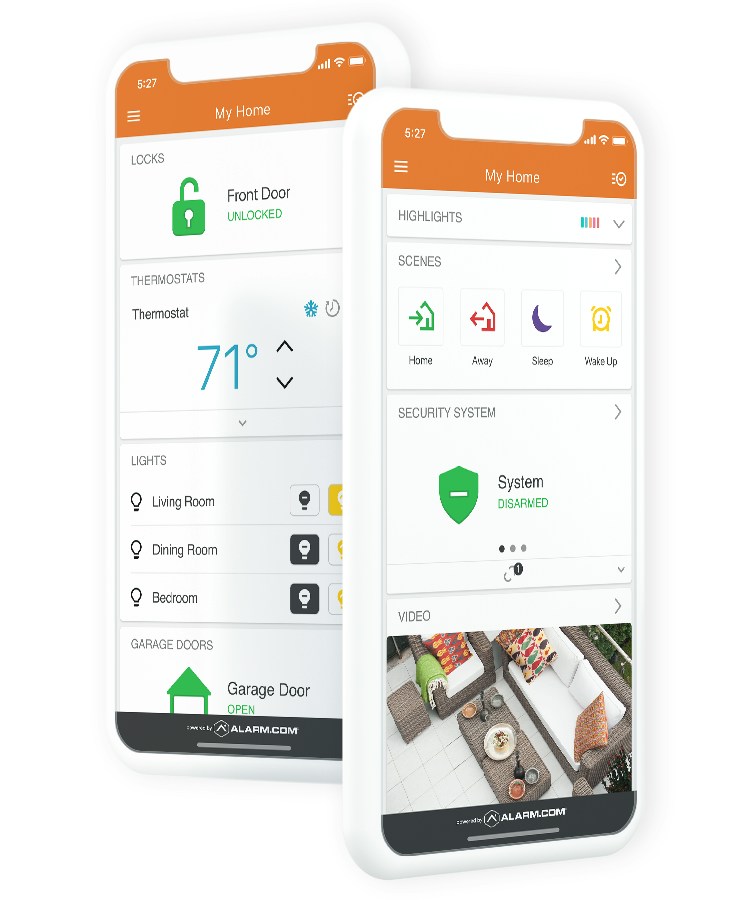
First sign-in: find your property

Alarm.com app showing security status, scenes, locks, lighting and garage controls
Your system in one app. Find your alarm status and controls for compatible devices. Official example: the display depends on your installation and plan.
  1. Install the official Alarm.com app from your phone's app store.
  2. Use the account activated for your installation. Panel and app must refer to the same property.
  3. Complete sign-in verification and enable useful notifications.
  4. Check the system status and expected devices.

The app alone does not create an installation. Ask your provider to check activation and permissions if the property or a device is missing.

Arm from Alarm.com

  1. Open the Security System tile and touch its status icon.
  2. Select Arm Stay if staying or Arm Away if the premises are empty.
  3. Review options and send the command.
  4. Wait for the status to confirm arming.

Remote IQ Panel 4 arming may occur without an exit delay, depending on settings. Send the command after leaving. Check excluded protection before choosing to bypass open zones.

Disarm from your phone

  1. Open the security tile and touch the armed status icon.
  2. Select Disarm.
  3. Wait for Disarmed before entering.

A pending command is not confirmation. Use your panel code according to the entry procedure if necessary. A phone without Internet or an offline device can prevent remote control.

Add a user or change an access code

  1. Disarm before changing a code remotely.
  2. Open Menu → Users. Select the person or add a profile.
  3. Enter or edit the access code and new user's name.
  4. Check authorized devices and schedules, then save.
  5. Allow time for transmission and verify operation.

A panel code does not automatically provide an app login. An administrator creates a separate login on the website under Users → Manage Logins → Add a Login and sets permissions.

When access is no longer needed, review panel, app, lock and garage permissions.

Forgotten password and account protection

Choose Forgot Username or Password on the sign-in screen. Enter your email or username and follow the message received. Check junk mail. Contact your provider for identity verification if you no longer control that email.

Use a unique password and enable two-factor authentication where available. Never share a verification code with someone contacting you unexpectedly.

Receive useful notifications

Under Notifications, add an available rule for arming, disarming or another event. Choose users, times and recipients, then save.

For example, receive an alert when an employee disarms at opening or an entrance is used while you are away. Check phone permissions and Do Not Disturb. Mobile notifications do not replace station procedures.

04 / Cameras and doorbell

See what's happening.
Answer from anywhere.

Indoor, outdoor and doorbell cameras: each one should serve a specific view and purpose.
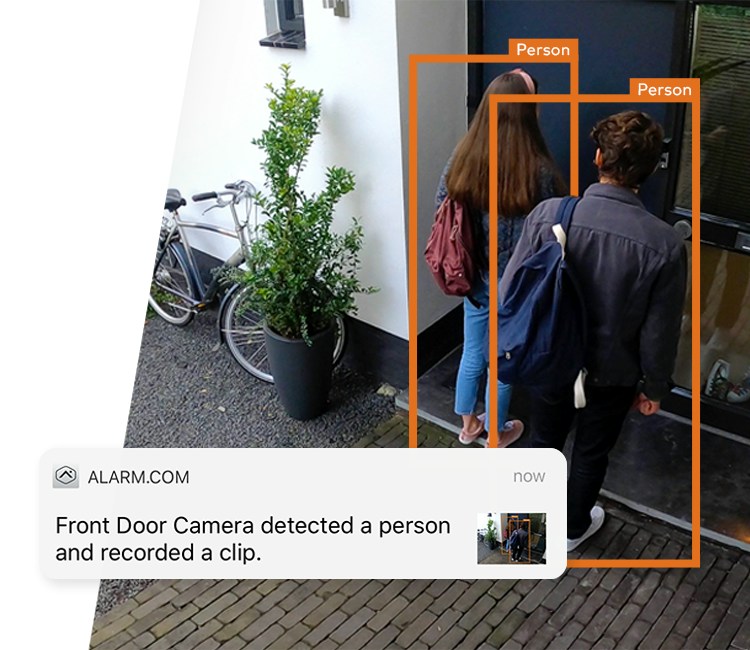
Alarm.com person detection notification example
Example of an Alarm.com video notification.

Outdoor cameras: start with entrances

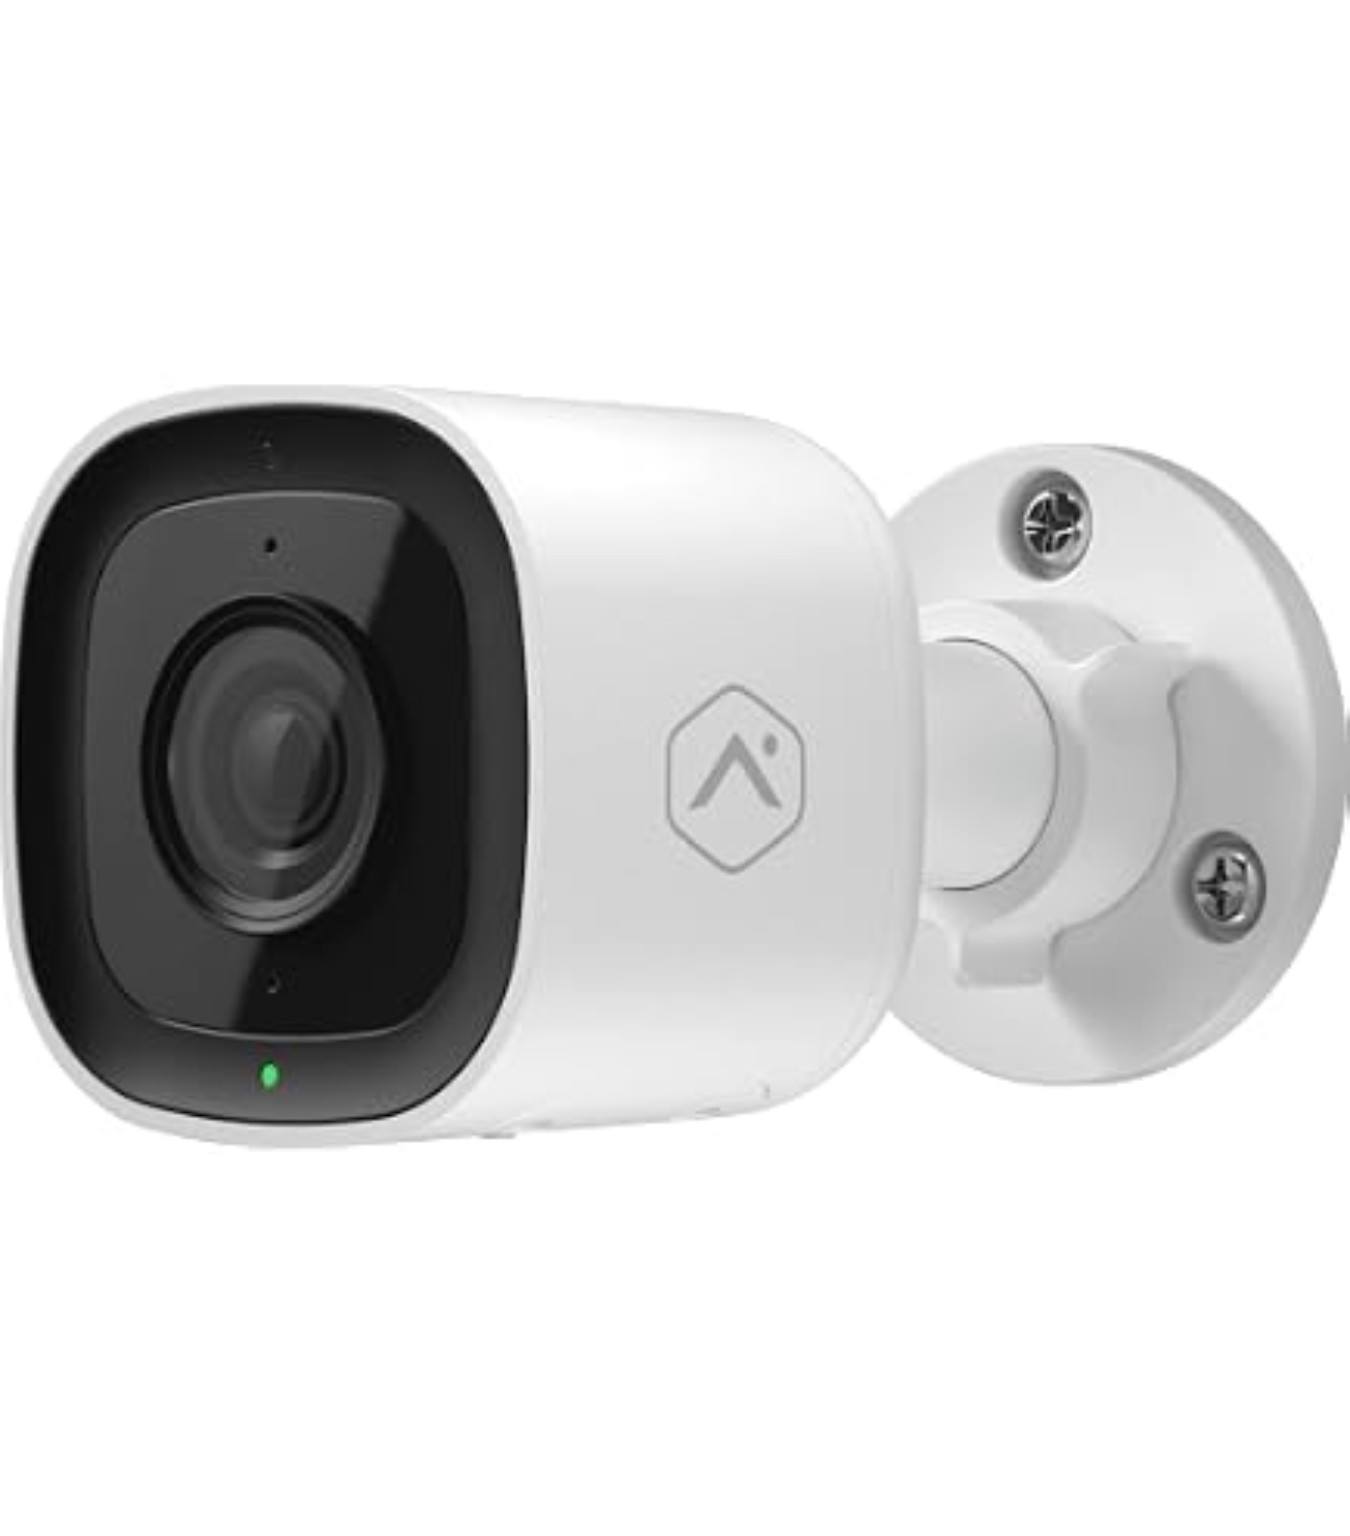
Alarm.com outdoor camera

The equipment

Alarm.com outdoor camera

Monitor an entrance, driveway or delivery access. Confirm the model, power supply and placement before installation.

Define your views: front entrance, driveway, back door or delivery entrance. Choose an outdoor-rated model and have power and connectivity checked at the planned location.

Before mounting, check faces, field of view, reflections and night lighting. Excessive height may show only the top of a head. Avoid unnecessarily filming neighbouring private spaces.
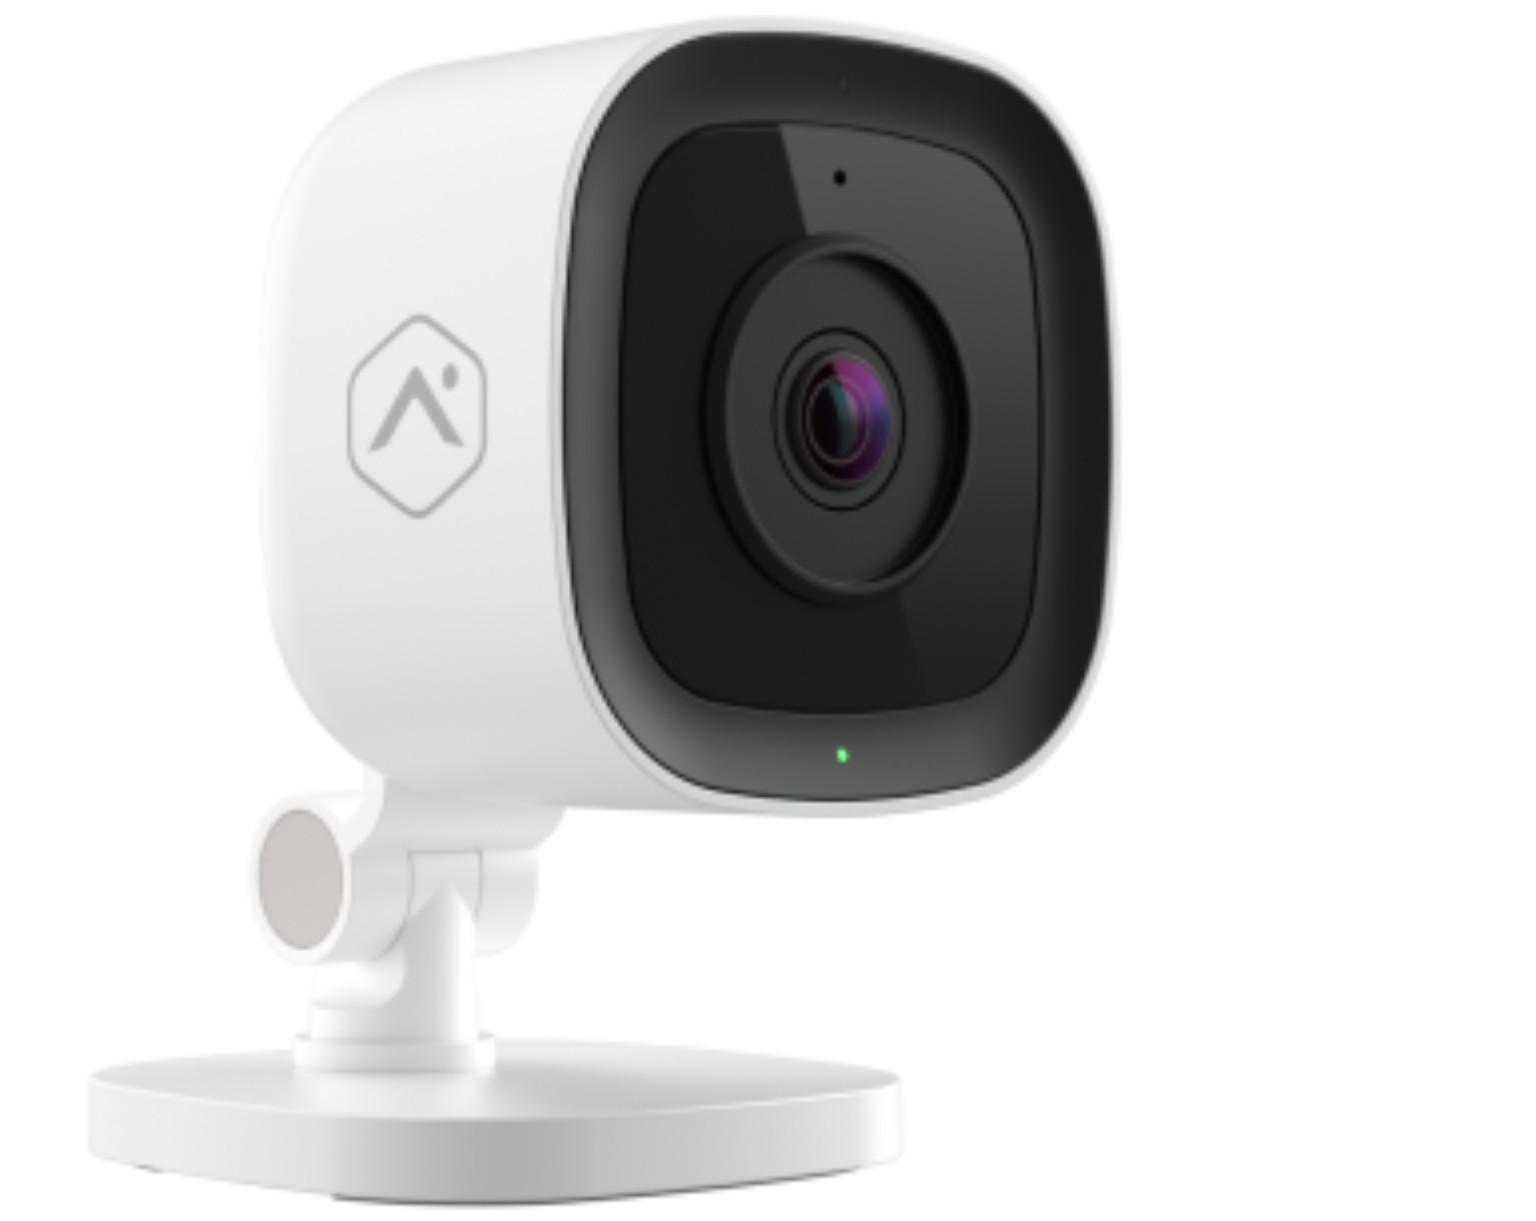
Indoor cameras: focus on useful views

Alarm.com indoor camera

The equipment

Alarm.com indoor camera

View a selected room or circulation area. Choose placement around the useful field of view and the people using the space.

A hallway, circulation area or workspace may be appropriate. Decide what the image must help verify. Avoid intimate spaces and inform occupants about cameras.

Filming through glass can cause reflections, especially at night. Use an appropriate outdoor installation instead of an indoor camera behind a window.

Add an Alarm.com camera to your account

  1. Confirm compatibility, active video service and permission to add a device.
  2. Power and connect the camera using its specified method: Wi-Fi, Ethernet or another supported connection.
  3. Open Video → Settings → Add Device, if available.
  4. Select the device, follow setup and give it a clear name.
  5. Check live video and recording settings before final mounting.

Other brands are not automatically compatible. Ask your provider if adding is unavailable or the device belongs to another account.

Watch live video and find an event

  1. Open Video and select the camera.
  2. Start live view for the current scene.
  3. For past events, open available recordings and choose a date or clip.

Live video, event clips and continuous recording are different features. Availability and retention depend on equipment, plan and settings. An alert does not guarantee continuous footage exists.
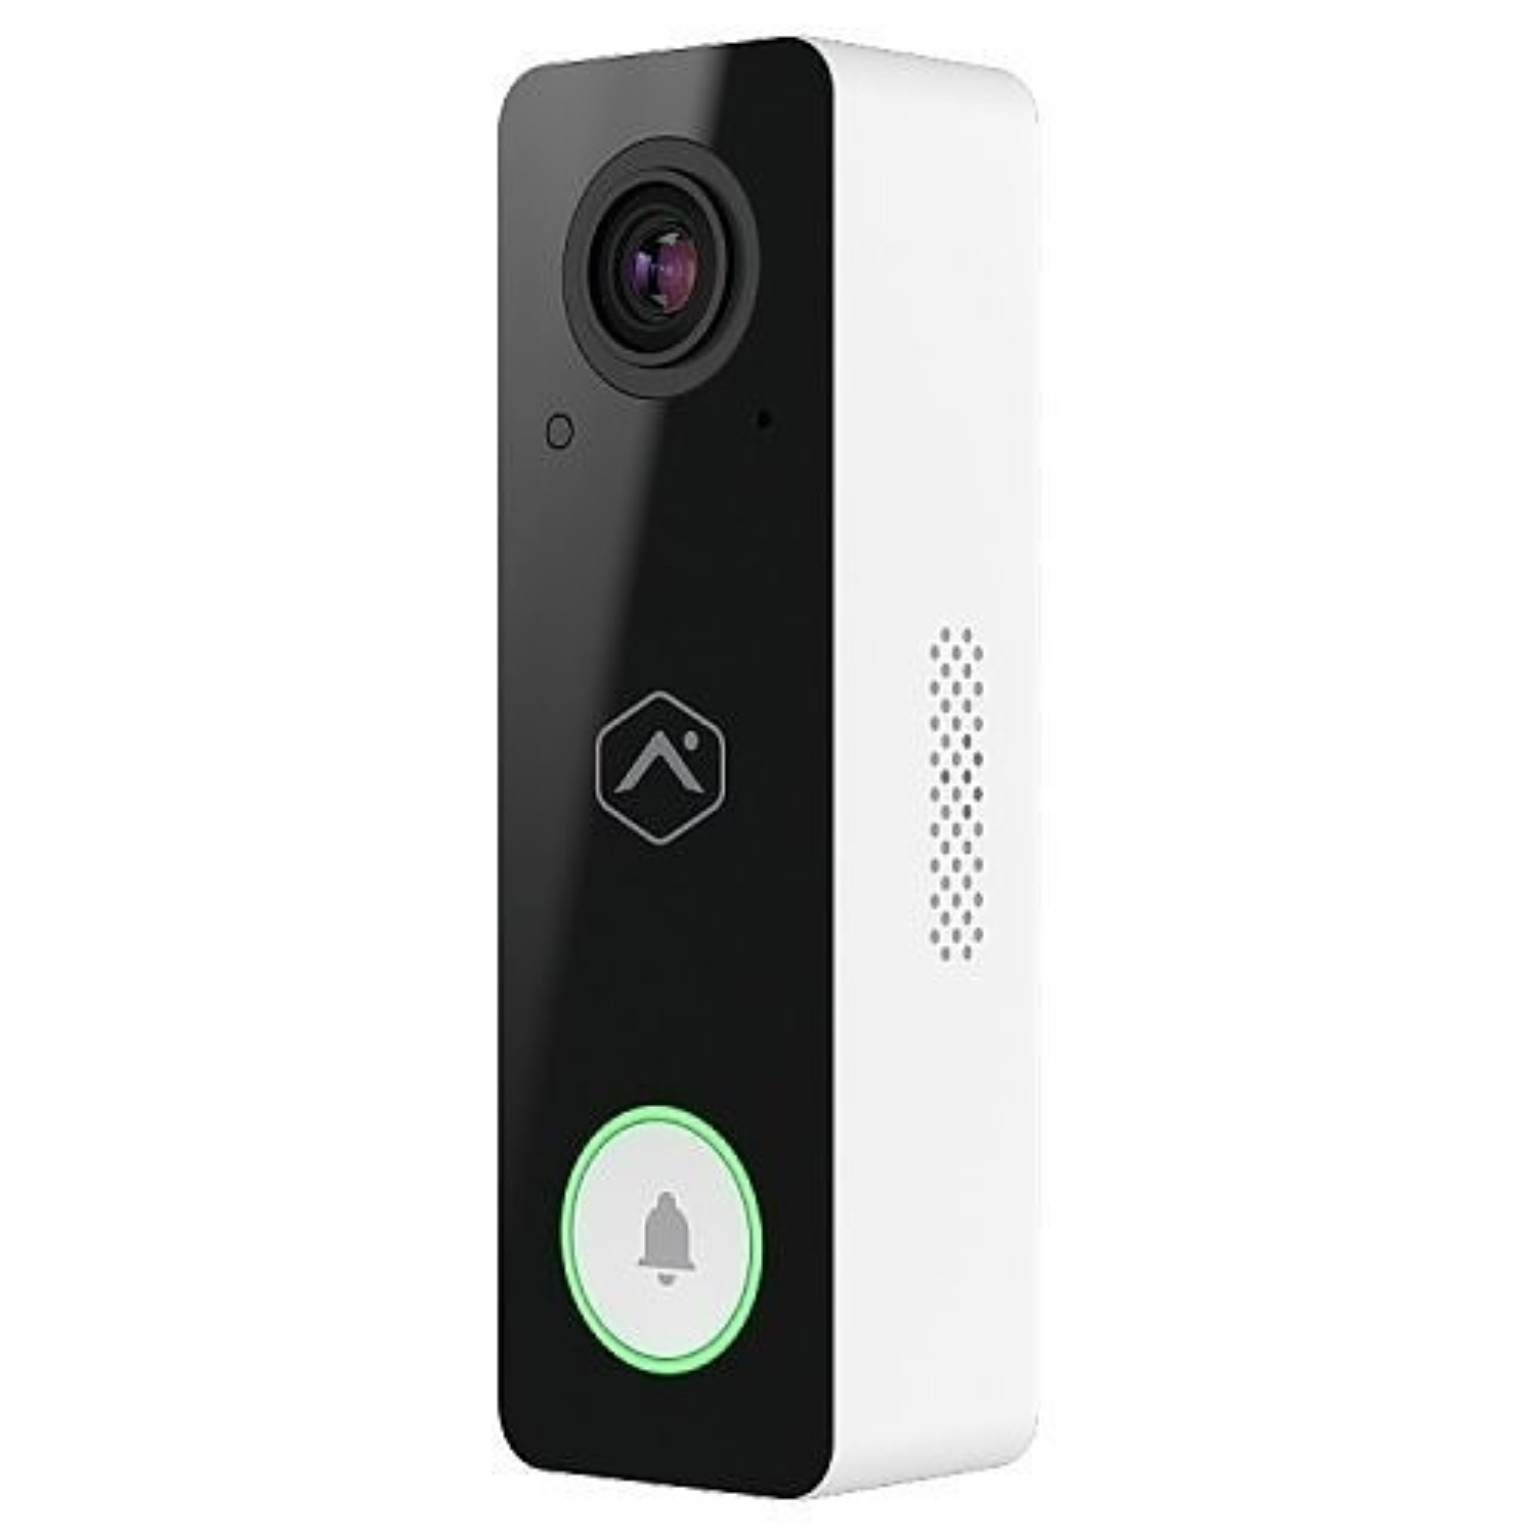
Video doorbell: see and speak to visitors

Alarm.com video doorbell

The equipment

Alarm.com video doorbell

See who is at the door and speak with visitors, depending on enabled features. Power and chime compatibility must match the model.

  1. Open the Alarm.com doorbell notification when someone rings, if alerts are enabled.
  2. Identify the person in live video.
  3. Use the microphone. Some models require holding a button; others support simultaneous conversation after one activation.
  4. End the conversation when finished.

Check phone volume, microphone permissions and camera audio if needed. Have position, framing, power and chime compatibility verified during installation.

05 / Lock and Smart Garage

Stay in control
of your entrances.

A connected lock or garage lets you operate compatible equipment from the app.
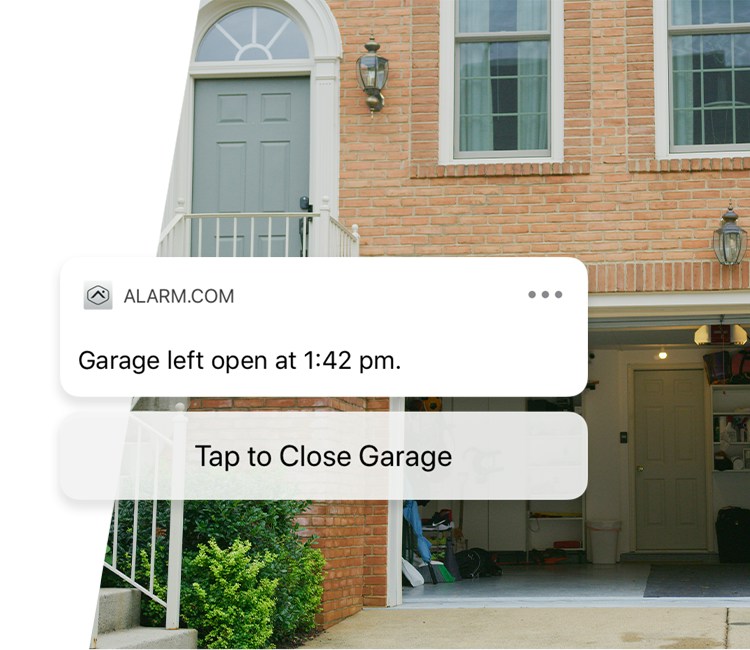
Official Alarm.com garage control example
Connected garage · Alarm.com example.

Lock and unlock a smart door lock

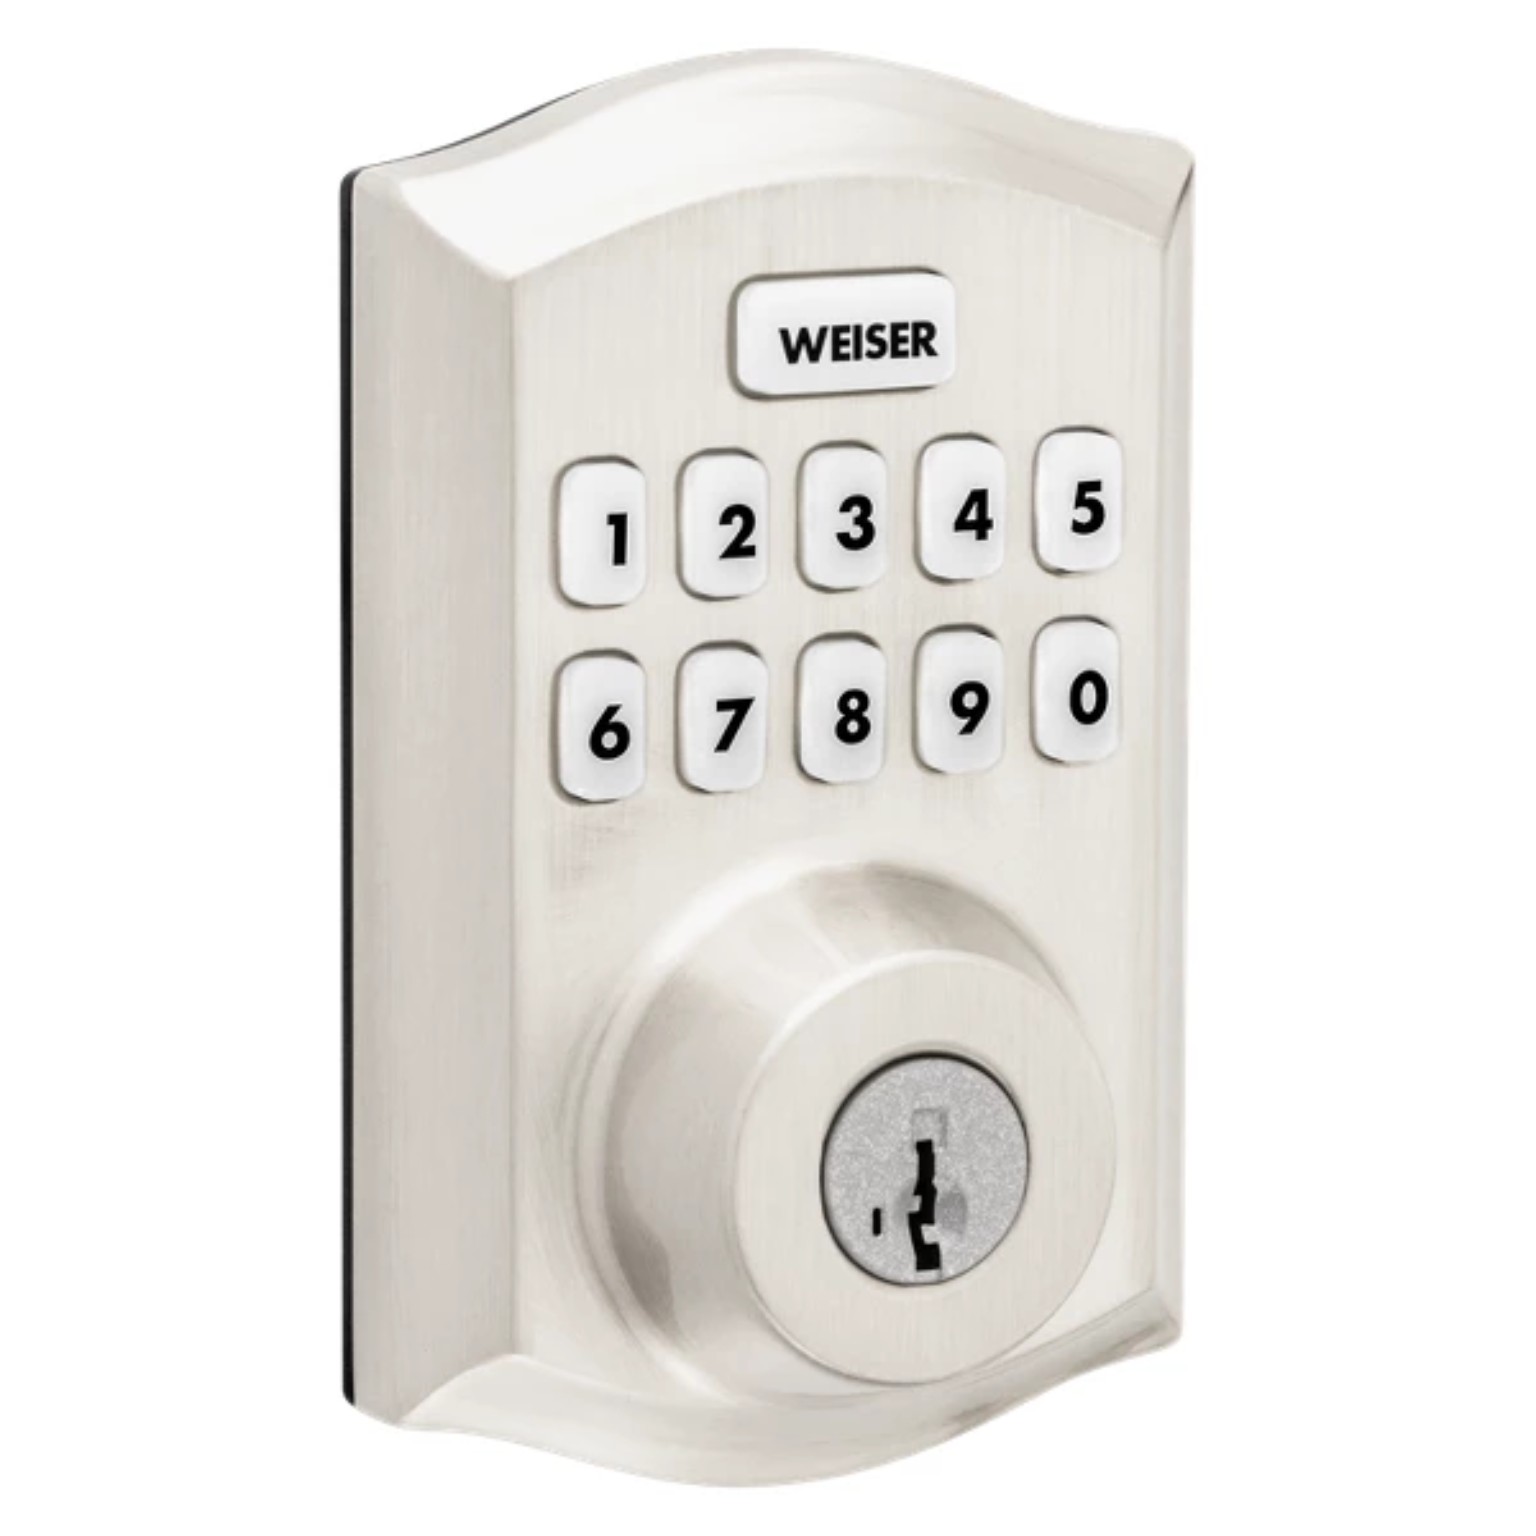
Weiser keypad lock

The equipment

Weiser keypad lock

The keypad provides code access. Alarm.com control requires a compatible connected version; a keypad alone does not establish compatibility.

  1. Open Locks in Alarm.com.
  2. Select the correct door.
  3. Touch Lock or Unlock.
  4. Check the reported status.

Retracting the bolt does not physically open the door. Check that it is closed and aligned. Locking and alarm arming are separate commands unless an automation is configured.
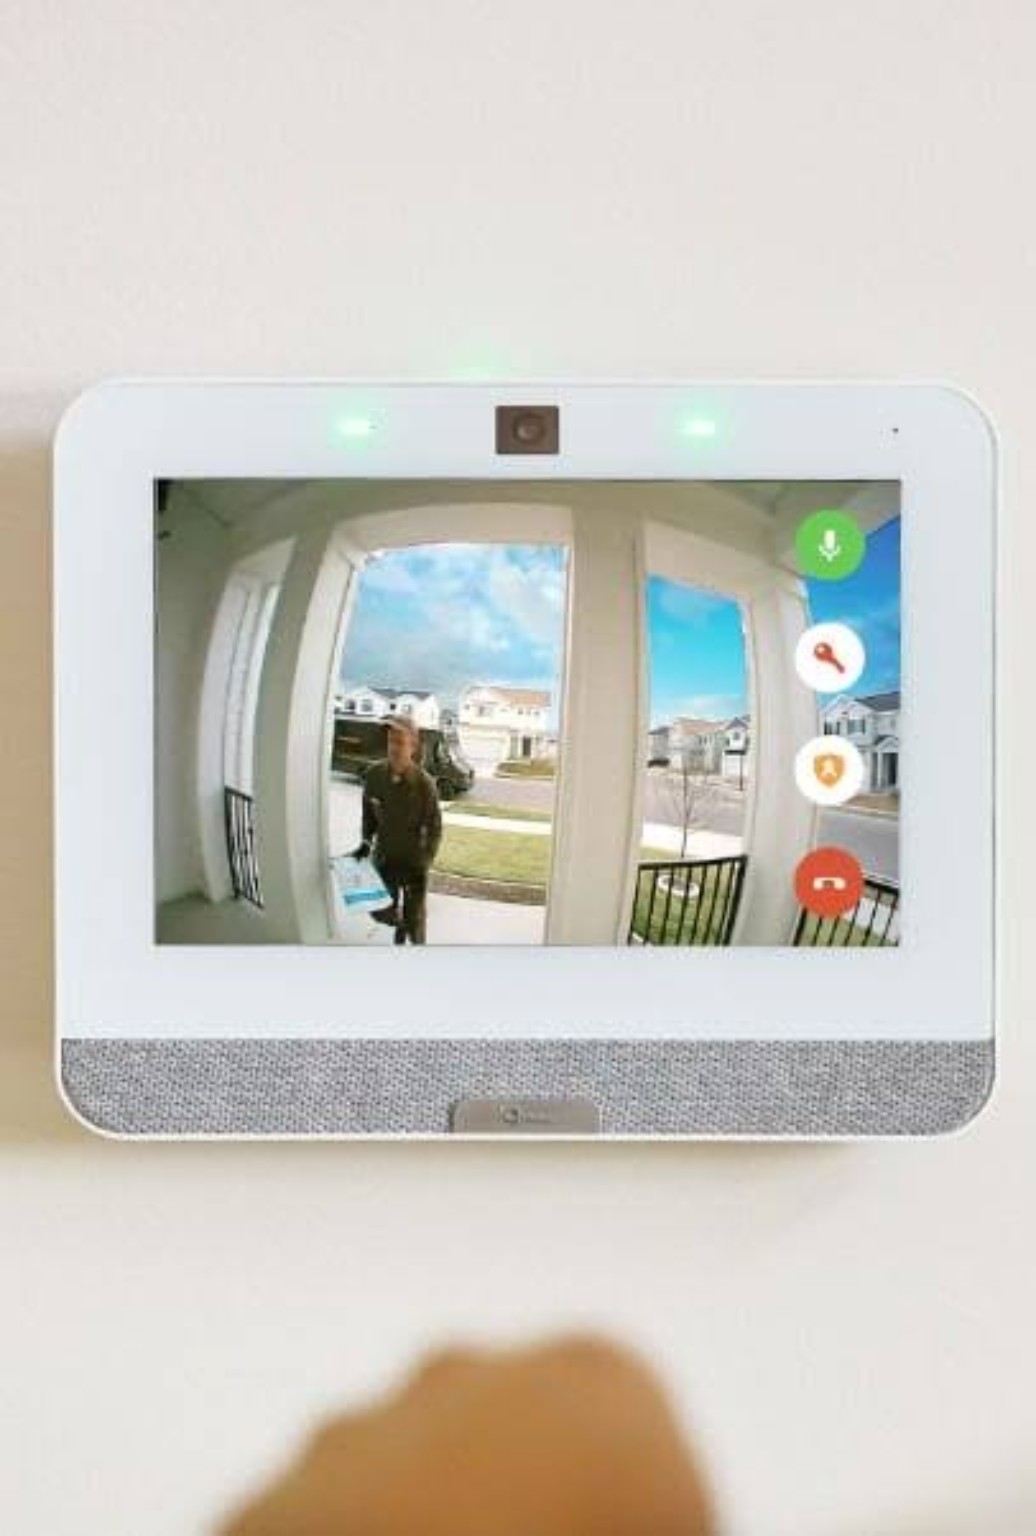
Example: a visitor rings and you grant access

See your visitor on the panel.
See your visitor on the panel. Example of video displayed on an IQ Panel. Video, audio and control availability depend on the panel, doorbell and configuration.
  1. Open the doorbell notification and identify the visitor.
  2. Speak with them and confirm permission to enter.
  3. Disarm before opening if required.
  4. Unlock the compatible door lock.
  5. After entry, verify closure and lock again. Rearm only when appropriate.

This admits a trusted person without sharing your main code. Video and lock control require compatible devices and relevant services.
Smart Garage: open and close your garage

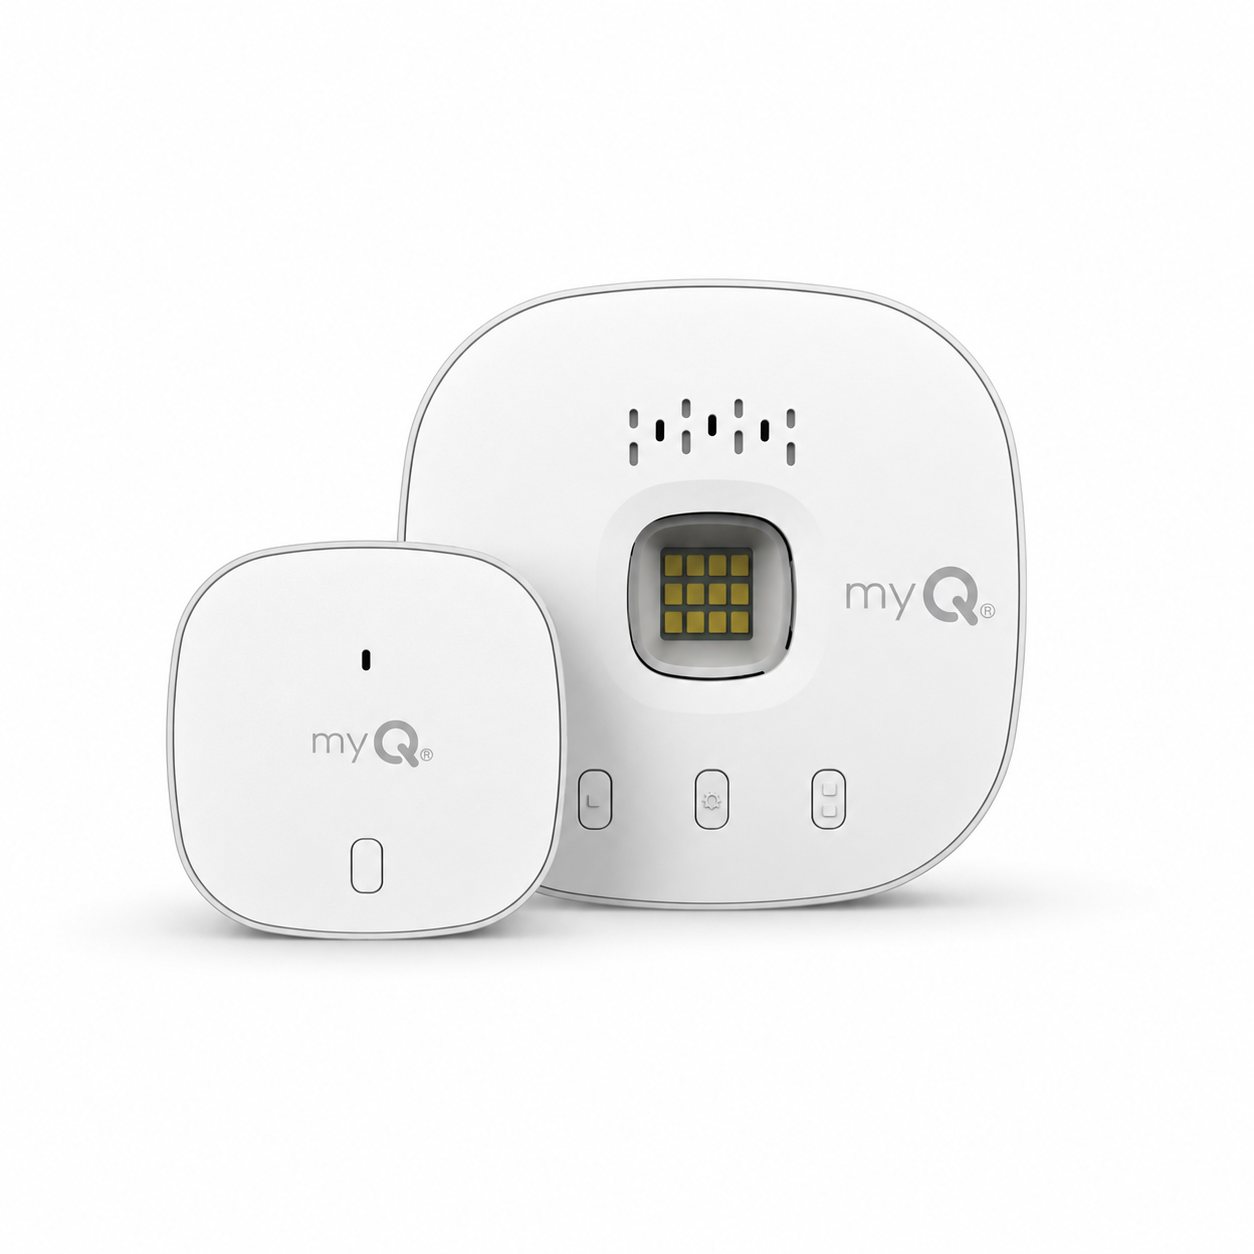
myQ garage controller and sensor

The equipment

myQ garage controller and sensor

Example of connected garage equipment. Alarm.com integration depends on the controller model, opener and activated service; confirm these before enrolment.

  1. Open Garage Doors in Alarm.com.
  2. Select the garage and check its status.
  3. Choose Open or Close and confirm sending.
  4. Wait for the new status. If absent, check the situation before trying again.

The opener and controller must be compatible. Have safety devices checked and verify the travel area. Never close onto a person, pet or object.

Example: receive a delivery in the garage

With an agreed drop-off and a way to check the scene, open at the appropriate time. Wait for the package to be placed and the driver to leave, then close and confirm. An available garage camera can help verify the visit.

Manual remote control is not automatically an integrated delivery service. Have an alternative if network or camera access fails. Manage access from the garage into the house according to your rules.

Get an alert if the garage stays open

Add an available garage notification rule. Choose the door, status change or “left open” condition, schedule and recipients. Check the rule's delay and save.

An alert helps you respond; it is not automatic closing, which needs separate configuration and safety conditions.

06 / Home automation

Lighting, plugs
and connected scenes.

Simple controls and automations chosen for your daily routine.
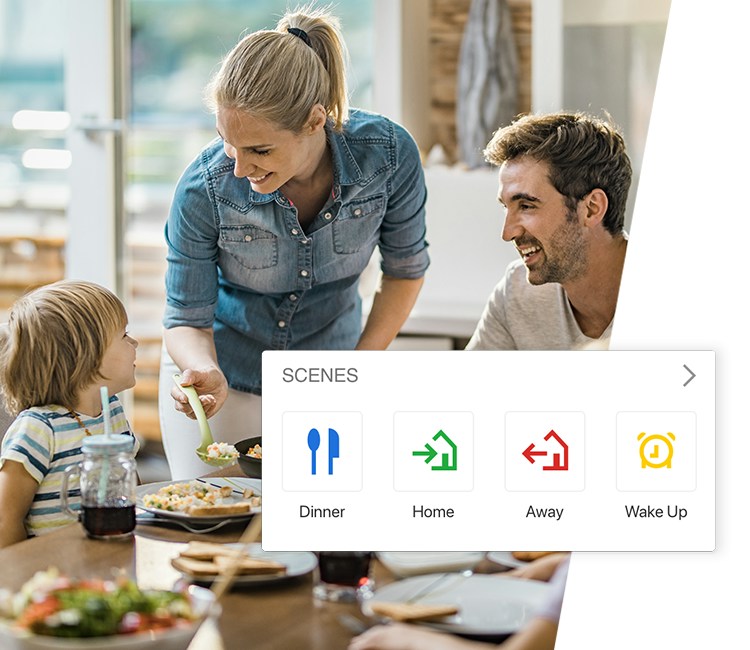
Official Alarm.com connected home scenes example
Scenes and lighting · Alarm.com example.

Control a light or smart plug

Select the named compatible device under lights or switches and turn it on or off. Dimming requires both the lamp and device to support it.

A lamp's physical switch generally needs to remain on when using a smart plug. Respect electrical ratings; do not connect heating or sensitive equipment without explicit compatibility.

Schedule lighting

  1. Open More / Menu → Automation.
  2. Add and name a schedule, such as “Entrance lighting”.
  3. Under When, choose a time or sunset if offered, and the days.
  4. Under Then, choose the device and action.
  5. Add a later switch-off action if needed, review and save.

Have service and compatibility checked if options are missing. Test a simple action before building multiple rules.

Create a scene with several actions

A scene combines available commands. “Away” might arm the system, turn off lamps and lock a compatible door if configured.

Add or edit a scene, select devices and actions, and save. Check each result during testing: a sent command does not prove a door is locked.

Do not add door opening or disarming to a routine without reviewing when and by whom it is used.

Thermostats and other connected devices

A compatible thermostat and service may provide temperature controls and schedules. A compatible valve can supplement leak protection. Each function needs its own equipment; Alarm.com does not automatically connect every appliance.

Use simple names such as “Living room lamp”, “Back door” and “Main garage” so everyone chooses the correct device.

07 / Connectivity and maintenance

Wi-Fi, alerts
and troubleshooting.

Practical checks to understand the issue before changing programming.
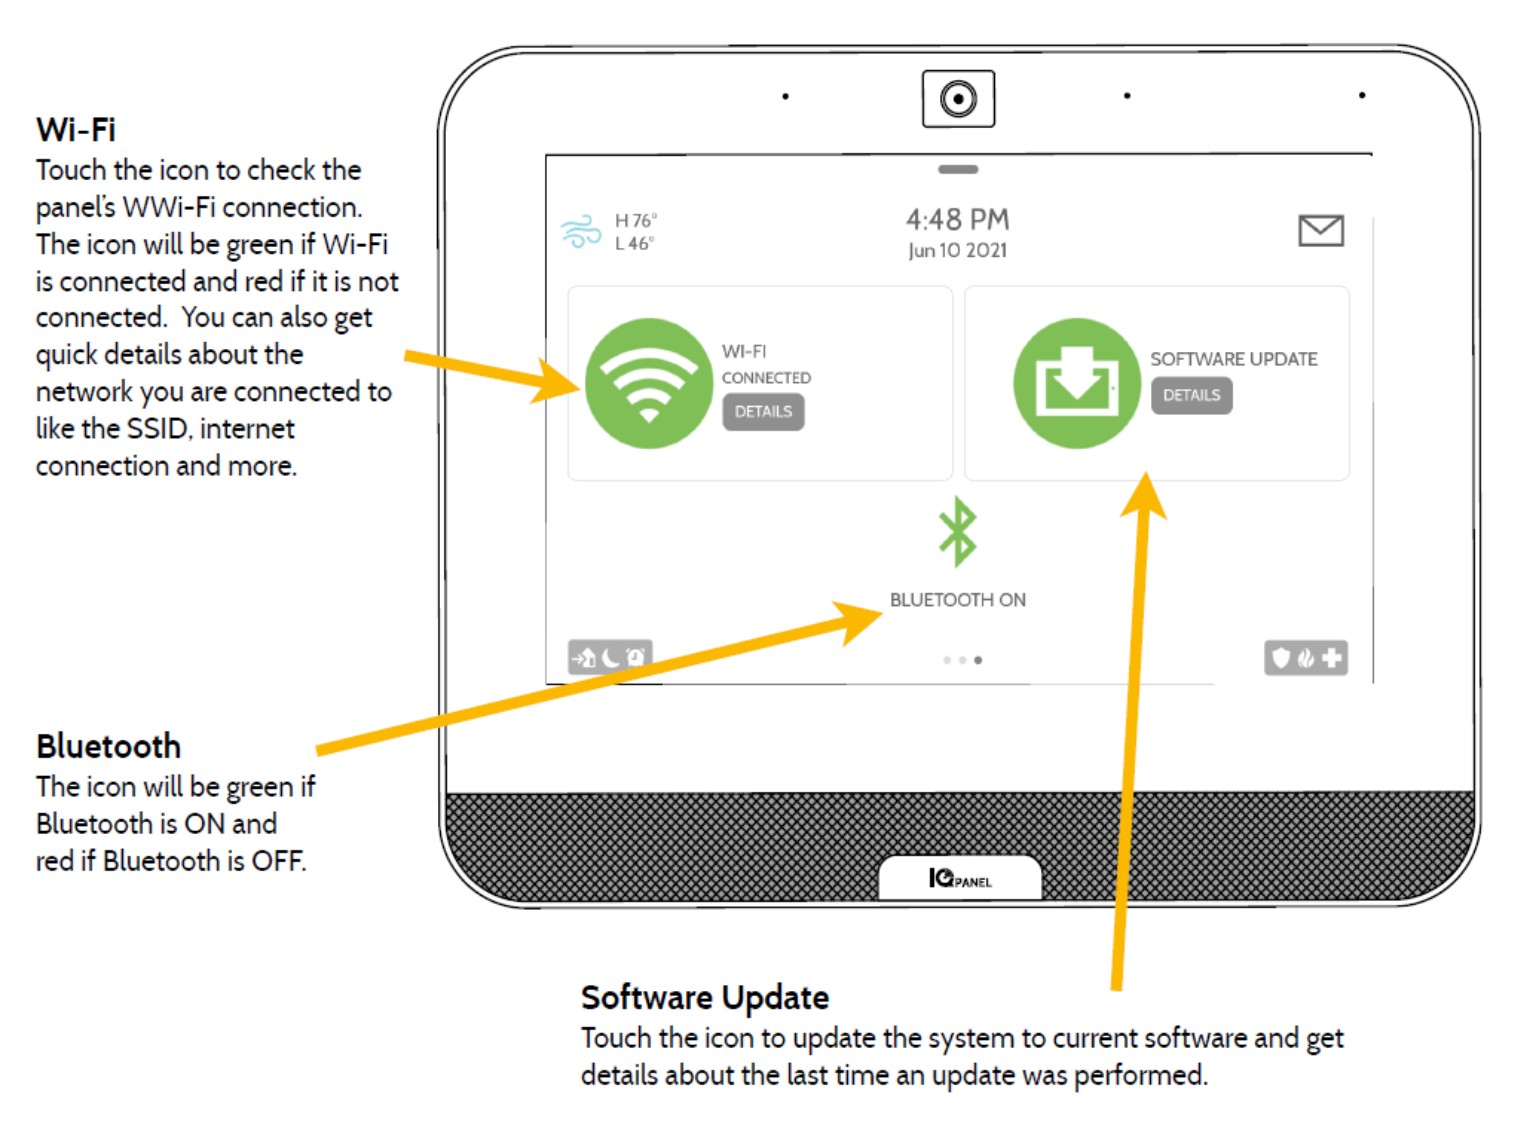
Reconnect the Qolsys panel to Wi-Fi

Wi-Fi, Bluetooth and software status.
Wi-Fi, Bluetooth and software status. Use this screen to check the panel connection. Follow the steps below to select a different network.Tap the image to enlarge.

On IQ Panel 4, open the top menu, then Settings → Advanced Settings. Enter your authorized master code, open Wi-Fi, enable it if needed and select your network. Enter its password, connect and check the status.

This reconnects the panel only; it does not send the new password to cameras. Panel cellular backup does not mean cameras have the same backup.

Reconnect a camera after changing your router

Identify the model first. Open the offline camera in Alarm.com and use its troubleshooting assistant. On some compatible models, access point mode allows reconnection:

  1. Hold WPS/Reset until the manual's white flashing pattern, often around five seconds on supported models, then release.
  2. Connect your phone to the camera's Wi-Fi, named ALARM or according to the model.
  3. Browse to 192.168.1.1 or the model's specified setup address.
  4. Select your network, enter its new password and save.
  5. Wait for connection, restore your phone's usual network and check live video.

Do not hold the button for 20 seconds on every camera. Exceeding seven seconds can reset some models. Doorbells and other generations may use a different method.

No camera picture, or a command does not complete

Check power, Internet and local signal. Start with the network if several devices fail together. For one affected device, note its light and exact message.

Do not remove or reset it as your first attempt. Resetting may require re-enrolment.

Prevent accidental alarms

Teach every user the entry door, personal code and disarming delay. Check entrances before arming. Record the triggered zone and circumstances rather than permanently disabling a detector.

Ask for a coverage review after renovations, moving devices or changing pets. Arrange transmission and emergency-device tests with your provider.

Checks to keep in your routine

Read low-battery messages, update contacts and remove former users. Check camera views regularly, especially after moving devices or changing lighting.

Follow manufacturer maintenance procedures and intervals. A working app does not replace checking detection and transmission to the monitoring station.

Before you choose

Which alarm system fits your property?

Start with daily life: who comes in, which entrances are exposed and who can respond to an alert. These three examples help prepare your project; the final configuration needs an on-site assessment.

01

House with a basement

Identify exterior doors, the door between the garage and house, and accessible windows. Consider ground-floor and basement routes for motion detection. Add protection according to the risks: water near the water heater, smoke and carbon monoxide according to the layout and applicable requirements.

Discuss pets, daytime occupants and entrances used at night.

02

Condo or apartment

Start with the entrance door and accessible private entrances, such as a ground-floor terrace. An indoor camera does not replace opening contacts. Check mounting and power options and any permissions needed for common areas.

Discuss whether you rent or own, building rules and the available network.

03

Shop, office or warehouse

List customer entrances, staff exits, delivery access and restricted areas. Plan individual codes, removal of former employees’ access and an opening and closing procedure. Define useful camera views: entrances, checkout or goods receiving.

Discuss schedules, alarm contacts, video storage needs and future changes to the premises.

Phone alerts or professional monitoring?

Receiving a notification and having a monitoring centre handle an alarm signal are different functions. Depending on your service, they can work together.

CompareNotifications / self-monitoringProfessional monitoring
Who receives the event?You or authorized people, when the notification reaches them.A monitoring centre receives signals covered by your agreement and follows the instructions on file.
What if you do not respond?A notification alone does not provide an operator to take over.The centre follows the agreed procedure for the signal and designated contacts.
Who requests help?You assess the situation and contact emergency services if needed.Handling may include requesting appropriate responders, subject to verification and applicable procedures.
What should you confirm?Enabled alerts, connectivity, phone permissions and recipients’ availability.Monitored signals, communication paths, contacts and services actually included.

A monitoring connection does not mean someone watches your cameras continuously. Video verification, where offered, should be specified separately. Neither notifications nor monitoring guarantee a response time.

Questions to ask before requesting a quote

Use these answers to compare proposals on the same basis, beyond the monthly price alone.

How much does a residential or commercial alarm system cost?

Cost depends on the number of entrances, equipment, existing wiring, installation and selected services. Ask for an itemized proposal separating equipment, installation, activation and subscription, plus taxes and optional features. A monthly price alone does not describe the total cost.

Does the system work without Internet?

It depends on the configuration. A panel with an active cellular connection can transmit certain signals without the property’s Internet network, subject to coverage and power. Cameras, remote video and other devices may have different requirements. Confirm exactly what remains available during an outage.

What happens during a power outage?

A panel with a working backup battery can keep operating for a limited period. Runtime depends on the model, battery condition and usage. This does not automatically power the router, cameras or garage motor. Ask about the limits and required maintenance.

Can existing sensors or wiring be reused?

Sometimes. Identify the model numbers, radio protocol or wiring type, then check condition and compatibility with the new panel. An adapter may be needed. Have the proposal identify which items will be retained, replaced and tested.

Does every door need a camera?

The number depends on the views you need, angles, lighting and obstructions. One camera will not necessarily cover several entrances usefully. Start by defining what you need to observe; door contacts and sensors serve a different purpose: detection.

What does professional installation involve?

Discuss placement and power, confirm the chosen equipment, then plan mounting, programming and testing. Training should cover arming, disarming, codes, the app and alarm procedures. Ask what is included in the visit and the terms for any follow-up service.

Who can view my cameras and control access?

Review authorized accounts and each person’s permissions. Use individual logins, remove former users and enable two-factor verification when available. Ask about any support or video verification access and recording retention settings.

Can I add a lock, garage controller or cameras later?

Yes, if your panel, equipment and service support them. Before buying, confirm the exact model, protocols, account limits and possible fees. A device described as smart or Wi-Fi is not automatically compatible with Alarm.com.

What should I check in the agreement and ongoing service?

Ask about the commitment period, payment terms, equipment ownership and conditions for moving or ending service. Confirm warranty, support, service visits and maintenance responsibilities. Keep the written proposal and your installation instructions.

Your project, our support

Why choose
Solution Alarme Plus?

A residential or commercial alarm system should suit your property and be easy to use. With Solution Alarme Plus, plan around three priorities: the entrances to protect, the equipment you need and the controls you will use every day.

01

Start with your property

House, condo, business or warehouse: tell us about your doors, circulation areas, schedules and authorized users. These details help us discuss protection suited to your situation.

02

Choose equipment that works together

Qolsys panel, sensors, cameras, lock or connected garage: we help you plan a configuration around your needs. Compatibility, remote features and included services should be confirmed in your proposal.

03

Understand your system

Learning the controls matters as much as choosing equipment. Use this guide to prepare questions and review arming, disarming, user codes and alerts. Contact our team for an issue related to your installation.

Technical references and notes

Instructions are provided directly on this page. The references below identify the original documentation. Follow your installed model's instructions and local requirements. Fire safety recommendations cited are from Québec; confirm applicable requirements for an Ontario installation.

App images are official examples. Panel screenshots vary by model and software. The home and business scenes are illustrations created for this page, not photographs of customer installations.

French IQ Panel illustrations come from the official Canadian French IQ Panel 4 user guide. Supplied English screenshots may show a different panel generation.

Alarm.com — understanding professional monitoring

Solution Alarme Plus

Let's talk about your protection.

House, condo or business: tell us about your entrances, existing equipment and needs.

Estimation gratuite

Remplissez ce formulaire et un conseiller vous contactera par téléphone et par courriel pour discuter des services et des produits qui répondent le mieux à vos besoins. Tous les champs sont obligatoires.

To use reCAPTCHA, you need to add the API Key and complete the setup process in Dashboard > Elementor > Settings > Integrations > reCAPTCHA.